Description
There’s something undeniably magical about the combination of chocolate and peanut butter. If you’ve ever unwrapped a Reese’s cup and savored that perfect balance of creamy, nutty filling and rich chocolate shell, you know exactly what I mean. But what if I told you that you could make them at home—easily, with just a few ingredients, and without any preservatives or additives?
Homemade Reese’s cups are the perfect treat for chocolate lovers, peanut butter enthusiasts, and anyone who enjoys a little indulgence. They make for a delightful homemade gift, a fun kitchen project with kids, or just a satisfying way to treat yourself. Plus, when you make them from scratch, you get to control the sweetness, texture, and even experiment with different flavors.
If you’re ready to create your own batch of these irresistible peanut butter cups, let’s get started!
Ingredients
- 1 cup creamy peanut butter
- ¼ cup unsalted butter, melted
- ¼ teaspoon salt
- ½ teaspoon vanilla extract
- 1 cup powdered sugar
- 2 cups chocolate chips (milk, dark, or semi-sweet)
- 2 teaspoons coconut oil (optional, for smoother chocolate)
Instructions
Line a muffin tin with cupcake liners. You can use a regular-size tin for larger peanut butter cups or a mini muffin tin for bite-sized treats. This step is important because it ensures the chocolate doesn’t stick, making it easier to remove later.
In a microwave-safe bowl, add the chocolate chips and coconut oil (if using). Microwave in 30-second increments, stirring well between each round, until the chocolate is completely melted and smooth. Be careful not to overheat it, as chocolate can burn easily.
Spoon about 1 teaspoon of melted chocolate into each cupcake liner. Use the back of the spoon to spread the chocolate evenly across the bottom. Place the tin in the freezer for about 10 minutes to set the chocolate layer.
In a mixing bowl, combine the peanut butter, melted butter, salt, vanilla extract, and powdered sugar. Stir until the mixture is smooth and thick. If it feels too sticky, you can add a little more powdered sugar to firm it up.
Once the bottom chocolate layer has set, scoop about 1 teaspoon of the peanut butter mixture into each liner. Flatten it slightly so it spreads evenly over the chocolate.
Pour another teaspoon of melted chocolate over each peanut butter layer, making sure to fully cover it. Use the back of the spoon to smooth it out.
Place the muffin tin back in the freezer for about 20 minutes, or until the chocolate is completely set.
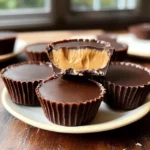
Once set, peel away the liners and enjoy your homemade Reese’s cups. Store them in the fridge to keep them firm, or let them sit at room temperature for a softer texture.
Notes
- Chocolate Type Matters – Milk chocolate gives you the classic Reese’s cup flavor, but dark chocolate adds a richer, slightly less sweet contrast. Feel free to mix and match!
- Muffin Tin Size – Regular muffin tins create larger peanut butter cups, while mini muffin tins make a bite-sized version. Choose based on your preference!
- Peanut Butter Consistency – Natural peanut butter can be a little runnier, so if using it, you may need to add extra powdered sugar to thicken the filling.
- Peanut Butter Layer Placement – If you want extra peanut butter flavor, press a slightly thicker layer into the middle before covering it with chocolate.
- Make Them Crunchy – For added texture, stir crushed peanuts or crispy rice cereal into the peanut butter filling.
- For a Professional Look – Drizzle extra melted chocolate over the top once they’re set or sprinkle a pinch of sea salt for a gourmet touch.
- Melting Chocolate Evenly – If you prefer, you can melt the chocolate using a double boiler instead of the microwave for more controlled heating.
- Don’t Skip the Chill Time – Allowing the layers to set in between steps prevents the chocolate from mixing with the peanut butter and keeps everything neat.