Description
There’s something about the scent of chocolate chip cookies baking in the oven that feels like a warm hug at the end of a long day. Now, imagine that comfort—melted chocolate, golden edges, soft centers—but layered with gooey, buttery caramel and a whisper of sea salt. That’s what these Salted Caramel Chocolate Chip Cookie Bars bring to your kitchen.
I first fell in love with these bars during a chilly fall weekend when the rain wouldn’t let up and the only thing left to do was bake something indulgent. I remember curling up on the couch, cookie bar in hand, marveling at how the sweet-salty combo hit every craving at once. It felt like wrapping myself in a cozy blanket, each bite a reminder that simple ingredients can create truly magical treats.
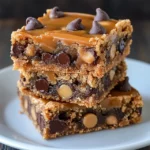
These bars strike that perfect balance between soft cookie dough and rich, sticky caramel, all topped off with a touch of flaky salt to pull it all together. They’re ideal for sharing—though be warned, they disappear fast. Whether you’re baking for a cozy night in, a family gathering, or just because it’s Tuesday, these bars are the kind of treat that people remember.
Ingredients
For the cookie dough:
¾ cup (170g) unsalted butter, melted and slightly cooled
1 cup (200g) light brown sugar, packed
¼ cup (50g) granulated sugar
2 large eggs
2 teaspoons vanilla extract
2¼ cups (280g) all-purpose flour
1 teaspoon baking soda
½ teaspoon salt
1½ cups (270g) chocolate chips
For the caramel filling:
1 can (397g or 14 oz) sweetened condensed milk
½ cup (100g) light brown sugar
¼ cup (60g) unsalted butter
¼ teaspoon sea salt
1 teaspoon vanilla extract
Topping:
Flaky sea salt, for sprinkling
Instructions
Step 1: Preheat and prep
Set your oven to 350°F (175°C) and line a 9×13-inch (23x33cm) baking pan with parchment paper, leaving some overhang for easy lifting later. This little trick makes cleanup a breeze and helps keep the bars perfectly shaped.
Step 2: Make the cookie dough
In a large mixing bowl, stir together the melted butter, brown sugar, and granulated sugar until smooth and glossy. Add the eggs and vanilla extract and mix until everything is well combined. You’ll notice the dough becoming creamy and rich-smelling at this point—always a good sign!
In a separate bowl, whisk together the flour, baking soda, and salt. Gradually fold the dry ingredients into the wet until just combined—don’t overmix. Fold in the chocolate chips, and try not to eat too much dough as you go. (No judgment, though.)
Step 3: Create the caramel filling
In a small saucepan, combine the sweetened condensed milk, brown sugar, butter, and salt. Stir over medium heat until the butter melts, and everything blends together into a thick, golden mixture. Bring it just to a gentle simmer while stirring constantly, then remove from heat and stir in the vanilla extract. Let it cool slightly so it thickens a bit—this step is key for getting that perfect caramel layer.
Step 4: Assemble the layers
Press about two-thirds of the cookie dough into the bottom of your prepared pan. Use a spatula or your fingers to gently smooth it out into an even layer.
Pour the caramel sauce over the dough, spreading it evenly. Drop the remaining cookie dough in spoonfuls over the top, gently pressing it down so some caramel still peeks through. That patchy topping turns into golden, crackled beauty in the oven.
Step 5: Bake to perfection
Bake for 25–30 minutes or until the top is golden brown and the edges look set. The center might still be a little jiggly from the caramel, but that’s exactly what you want.
Step 6: Cool and sprinkle
Let the bars cool completely in the pan—this part takes patience, but it’s worth it. Once cooled, sprinkle with flaky sea salt and lift out using the parchment paper. Slice into bars and prepare for oohs and ahhs.
Notes
These bars can easily be made a day ahead—they actually taste even better once the flavors have had time to settle. If you’re making them for a gathering, feel free to cut them into smaller squares for bite-sized treats.