There’s something almost magical about the combination of strawberries and chocolate. Growing up, these two flavors often meant celebration — a birthday, a holiday, or even just a Saturday when my mom decided we all needed a little extra sweetness. And when you marry those flavors into a creamy, rich cheesecake? It becomes the ultimate dessert to gather everyone around the table, each slice feeling like a little love letter wrapped in decadent goodness.

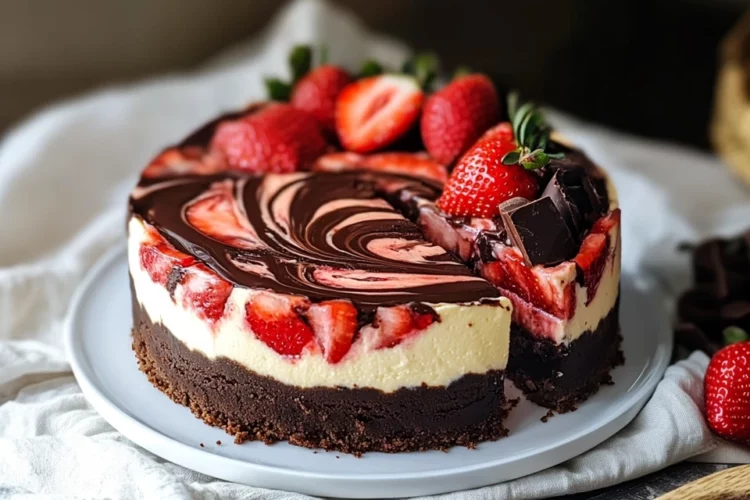
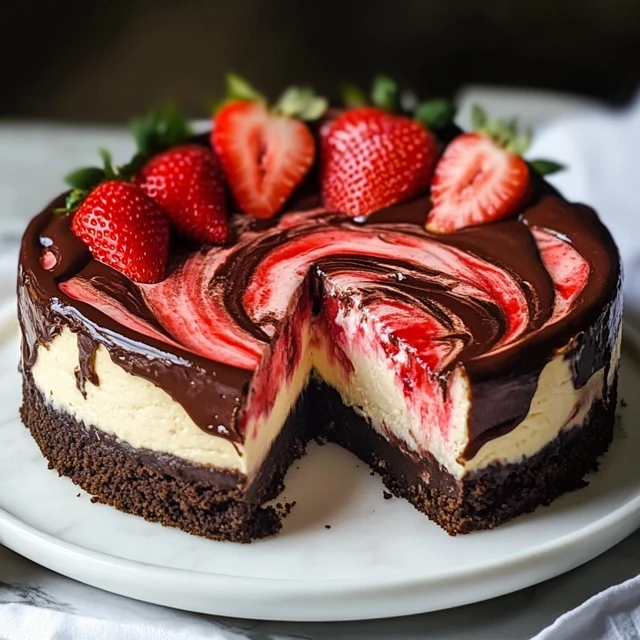
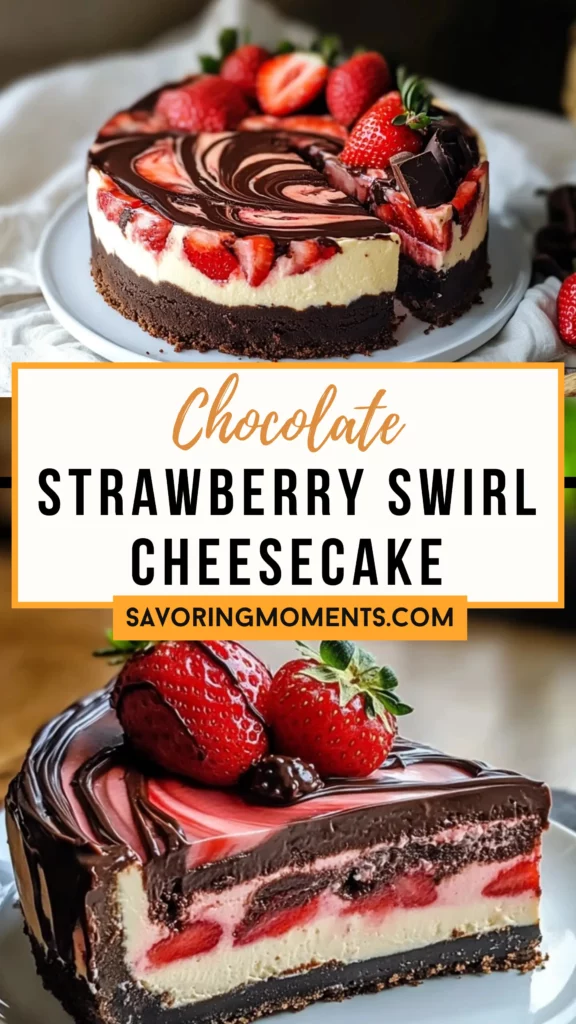
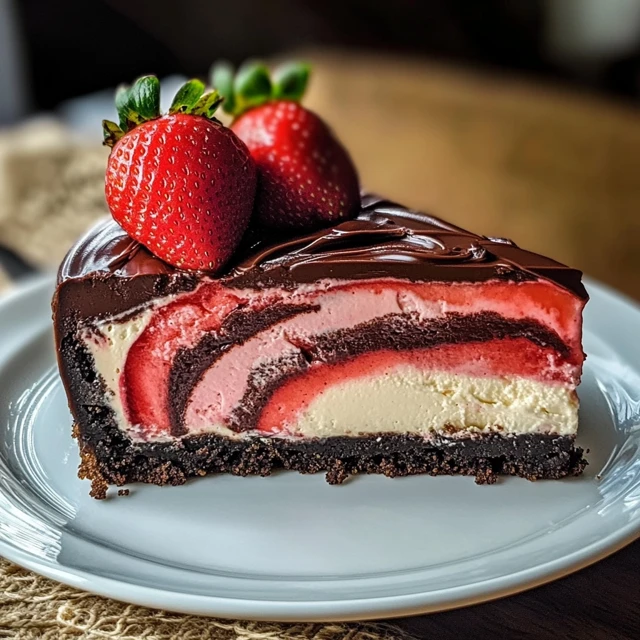
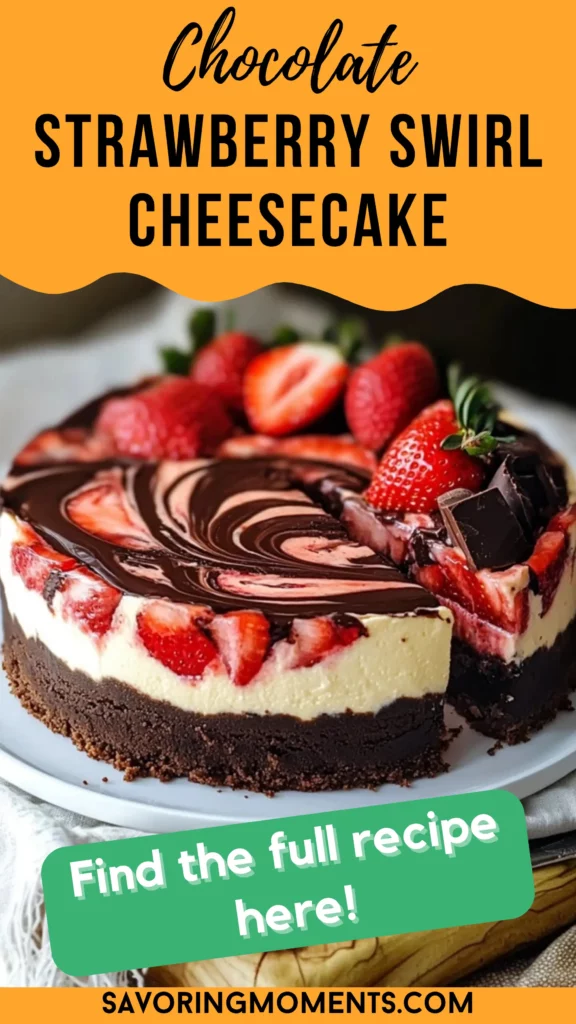
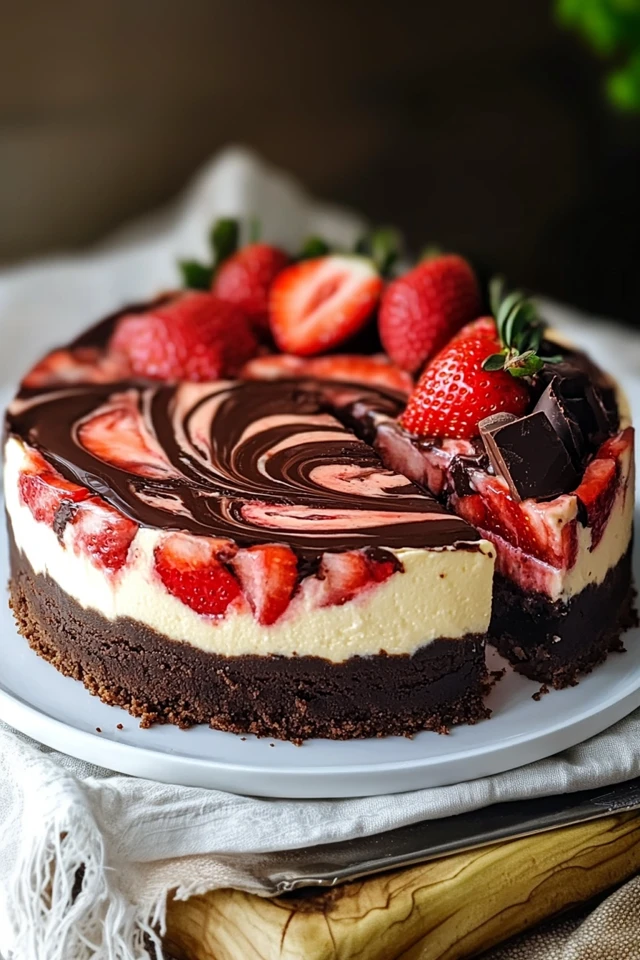
The Chocolate Strawberry Swirl Cheesecake feels like a hug in dessert form. The bright, fruity ribbons of strawberry jam swirl through the silky cheesecake, creating a stunning marbled effect that looks almost too beautiful to eat — almost. Perfect for Valentine’s Day, Mother’s Day, or any special occasion where you want to impress without stress, this cheesecake isn’t just a dessert; it’s an experience, a centerpiece, and a memory-maker.
There’s an old tradition in my family that strawberries symbolize love and chocolate represents luxury, so whenever we serve this cheesecake, it’s a way of saying, “You’re loved, and you deserve the best.” And truly, after one bite, it’s impossible not to feel both.
Why You’ll Love This Recipe:
- It looks stunning with minimal effort — those swirls make you look like a pastry chef without fancy skills.
- Perfect balance between rich chocolate and fresh, fruity strawberry flavor.
- Creamy, luscious texture that melts in your mouth.
- A great make-ahead dessert — it tastes even better after chilling overnight.
- No complicated techniques, just simple steps that anyone can follow.
INGREDIENTS YOU’LL NEED:
For the Crust:
- 24 chocolate sandwich cookies (like Oreos)
- 5 tablespoons unsalted butter, melted
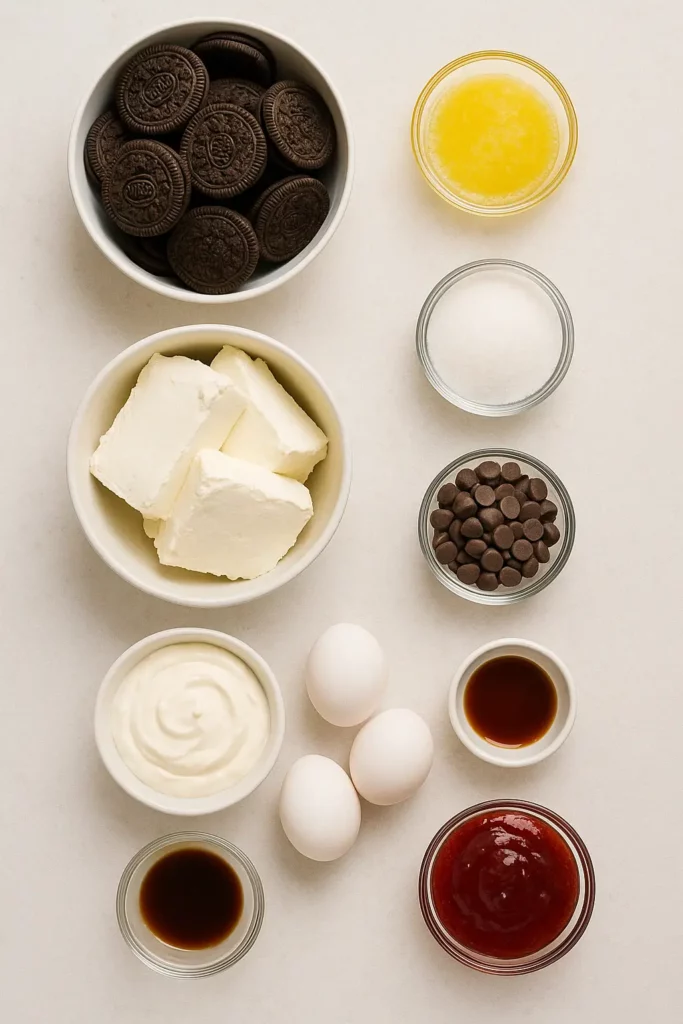
For the Cheesecake Filling:
- 3 (8-ounce) packages cream cheese, softened
- 1 cup granulated sugar
- 1 teaspoon vanilla extract
- 3 large eggs
- ½ cup sour cream
- ½ cup semi-sweet chocolate chips, melted and slightly cooled
- ⅓ cup strawberry jam, stirred until smooth
HOW TO MAKE Chocolate Strawberry Swirl Cheesecake:
STEP-BY-STEP INSTRUCTIONS:
Step 1: Prepare Your Crust
Start by preheating your oven to 325°F (163°C). While the oven warms up, grab your chocolate sandwich cookies and crush them into fine crumbs. You can use a food processor or just pop them into a zip-top bag and crush them with a rolling pin — a great stress reliever!
Mix the crumbs with melted butter until it feels like damp sand. Press the mixture firmly into the bottom of a 9-inch springform pan. I like to use the bottom of a measuring cup to get it really nice and even. Pop the crust into the oven and bake for about 10 minutes, then let it cool while you make the filling.
Step 2: Make the Cheesecake Batter
In a large bowl, beat the softened cream cheese until it’s fluffy and smooth. No lumps allowed here — give it a good few minutes! Gradually add the sugar and keep beating. Then mix in the vanilla extract.
Add the eggs one at a time, beating well after each addition. Don’t rush this part; it helps the cheesecake stay velvety. Stir in the sour cream until everything is luscious and creamy.
Step 3: Create the Chocolate Layer
Now for the magic: take about 1 cup of your cheesecake batter and stir it together with the melted semi-sweet chocolate. This becomes your rich, chocolatey swirl.
Step 4: Assemble the Cheesecake
Pour the plain cheesecake batter over the cooled crust and spread it out evenly. Drop spoonfuls of the chocolate batter and strawberry jam all over the top. Using a butter knife, gently swirl the toppings together. Don’t overmix — you want pretty ribbons, not a blended mess.
Step 5: Bake and Cool
Place the pan in the oven and bake for about 55-65 minutes. The edges should look set, but the center will still jiggle a little when you gently shake the pan. Turn the oven off, crack the door open, and let the cheesecake cool inside for an hour.
After that, chill it in the fridge for at least 4 hours — overnight is even better. That patience pays off with every creamy bite.
HELPFUL TIPS:
- Always use room temperature cream cheese to avoid lumps in your batter.
- If you don’t have a springform pan, you can line a regular cake pan with parchment and lift it out carefully after chilling.
- Run your knife through hot water before slicing the cheesecake for cleaner cuts.
- Stir your strawberry jam really well before adding to get smoother swirls.
DETAILS:
- Prep Time: 20 minutes
- Cook Time: 1 hour
- Total Time: About 6 hours (including cooling and chilling)
- Yield: 12 slices
- Category: Dessert
- Method: Baking
- Cuisine: American
- Diet: Vegetarian
NOTES:
If your cheesecake cracks a little on top — don’t worry. You can easily cover it with a few extra dollops of jam or fresh strawberries. Honestly, it just adds character!
NUTRITIONAL INFORMATION:
(Per slice, approximate)
- Calories: 420
- Carbohydrates: 32g
- Protein: 6g
- Fat: 31g
- Saturated Fat: 17g
- Cholesterol: 110mg
- Sodium: 270mg
- Sugar: 23g
FREQUENTLY ASKED QUESTIONS:
Can I use a different fruit jam?
Absolutely! Raspberry or cherry jam would also be incredible in this cheesecake.
How do I know when the cheesecake is done baking?
It should be mostly set but still have a slight jiggle in the center. It will firm up fully as it cools.
Do I need a water bath?
Not for this recipe! The cheesecake turns out beautifully without the hassle of a water bath.
STORAGE INSTRUCTIONS:
Cover the cheesecake with plastic wrap or foil and keep it in the refrigerator. It will stay fresh for up to 5 days.
You can also freeze individual slices: just wrap tightly in plastic and place them in a freezer bag for up to 2 months. Thaw overnight in the fridge before enjoying.
Related Recipes
If you liked this recipe, you’ll definitely enjoy these other creamy delights:
- Cream Cheese Strawberry Banana Bread
- Red Velvet Cheesecake: Decadent, Creamy, and Perfect for Celebrations
- Heavenly Black Forest Cheesecake Delight
- Luscious Lemon Raspberry Swirl Cheesecake Cups
CONCLUSION
Chocolate Strawberry Swirl Cheesecake is the kind of dessert that brings people together. Whether it’s a special occasion or just a Wednesday that needed a little sparkle, this cheesecake feels like a celebration in every bite. With its stunning looks and unforgettable flavor, it’s sure to become a favorite in your home — just like it has in mine. So grab your mixing bowl, turn up your favorite playlist, and get ready to swirl your way into dessert heaven.
Print
Chocolate Strawberry Swirl Cheesecake
Description
There’s something almost magical about the combination of strawberries and chocolate. Growing up, these two flavors often meant celebration — a birthday, a holiday, or even just a Saturday when my mom decided we all needed a little extra sweetness. And when you marry those flavors into a creamy, rich cheesecake? It becomes the ultimate dessert to gather everyone around the table, each slice feeling like a little love letter wrapped in decadent goodness.
The Chocolate Strawberry Swirl Cheesecake feels like a hug in dessert form. The bright, fruity ribbons of strawberry jam swirl through the silky cheesecake, creating a stunning marbled effect that looks almost too beautiful to eat — almost. Perfect for Valentine’s Day, Mother’s Day, or any special occasion where you want to impress without stress, this cheesecake isn’t just a dessert; it’s an experience, a centerpiece, and a memory-maker.
There’s an old tradition in my family that strawberries symbolize love and chocolate represents luxury, so whenever we serve this cheesecake, it’s a way of saying, “You’re loved, and you deserve the best.” And truly, after one bite, it’s impossible not to feel both.
Ingredients
For the Crust:
24 chocolate sandwich cookies (like Oreos)
5 tablespoons unsalted butter, melted
For the Cheesecake Filling:
3 (8-ounce) packages cream cheese, softened
1 cup granulated sugar
1 teaspoon vanilla extract
3 large egg
½ cup sour cream
½ cup semi-sweet chocolate chips, melted and slightly cooled
⅓ cup strawberry jam, stirred until smooth
Instructions
Step 1: Prepare Your Crust
Start by preheating your oven to 325°F (163°C). While the oven warms up, grab your chocolate sandwich cookies and crush them into fine crumbs. You can use a food processor or just pop them into a zip-top bag and crush them with a rolling pin — a great stress reliever!
Mix the crumbs with melted butter until it feels like damp sand. Press the mixture firmly into the bottom of a 9-inch springform pan. I like to use the bottom of a measuring cup to get it really nice and even. Pop the crust into the oven and bake for about 10 minutes, then let it cool while you make the filling.
Step 2: Make the Cheesecake Batter
In a large bowl, beat the softened cream cheese until it’s fluffy and smooth. No lumps allowed here — give it a good few minutes! Gradually add the sugar and keep beating. Then mix in the vanilla extract.
Add the eggs one at a time, beating well after each addition. Don’t rush this part; it helps the cheesecake stay velvety. Stir in the sour cream until everything is luscious and creamy.
Step 3: Create the Chocolate Layer
Now for the magic: take about 1 cup of your cheesecake batter and stir it together with the melted semi-sweet chocolate. This becomes your rich, chocolatey swirl.
Step 4: Assemble the Cheesecake
Pour the plain cheesecake batter over the cooled crust and spread it out evenly. Drop spoonfuls of the chocolate batter and strawberry jam all over the top. Using a butter knife, gently swirl the toppings together. Don’t overmix — you want pretty ribbons, not a blended mess.
Step 5: Bake and Cool
Place the pan in the oven and bake for about 55-65 minutes. The edges should look set, but the center will still jiggle a little when you gently shake the pan. Turn the oven off, crack the door open, and let the cheesecake cool inside for an hour.
After that, chill it in the fridge for at least 4 hours — overnight is even better. That patience pays off with every creamy bite.
Notes
If your cheesecake cracks a little on top — don’t worry. You can easily cover it with a few extra dollops of jam or fresh strawberries. Honestly, it just adds character!