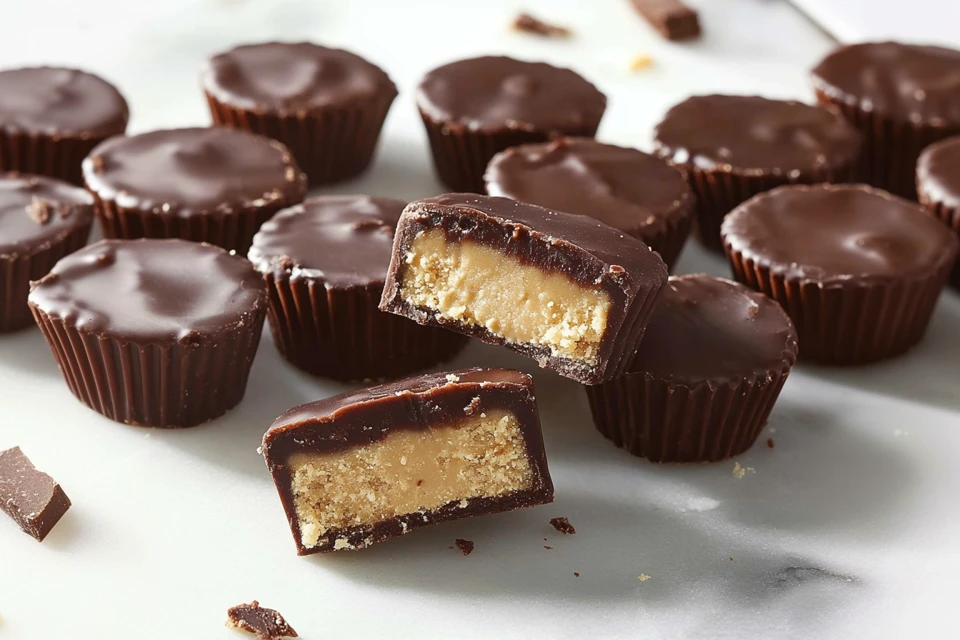
When the days grow shorter and the air carries that crisp hint of fall, there is something utterly comforting about indulging in a treat that reminds you of simpler times. For me, Twix bars were a childhood favorite—the perfect combination of buttery cookie, smooth caramel, and rich chocolate. As I grew older and more conscious about my health, I longed for a version that could deliver the same joy without the sugar crash. That is when I discovered Healthy Twix Cups.

These delightful little cups bring together everything you love about the classic candy bar but with wholesome, nourishing ingredients. They have quickly become a seasonal staple in my kitchen, especially around Halloween and cozy movie nights. The rich layers are not only incredibly satisfying but also feel indulgent while staying true to a more natural, plant-based lifestyle.
The cultural significance of reinventing beloved classics into healthier versions reflects a broader movement towards mindful eating—honoring both tradition and wellness. Whether you’re sharing them at a fall gathering or keeping a secret stash in your fridge, Healthy Twix Cups are a bite-sized celebration of comfort, nostalgia, and nourishment.

Why You’ll Love This Healthy Twix Cups Recipe
- Made with natural, plant-based ingredients.
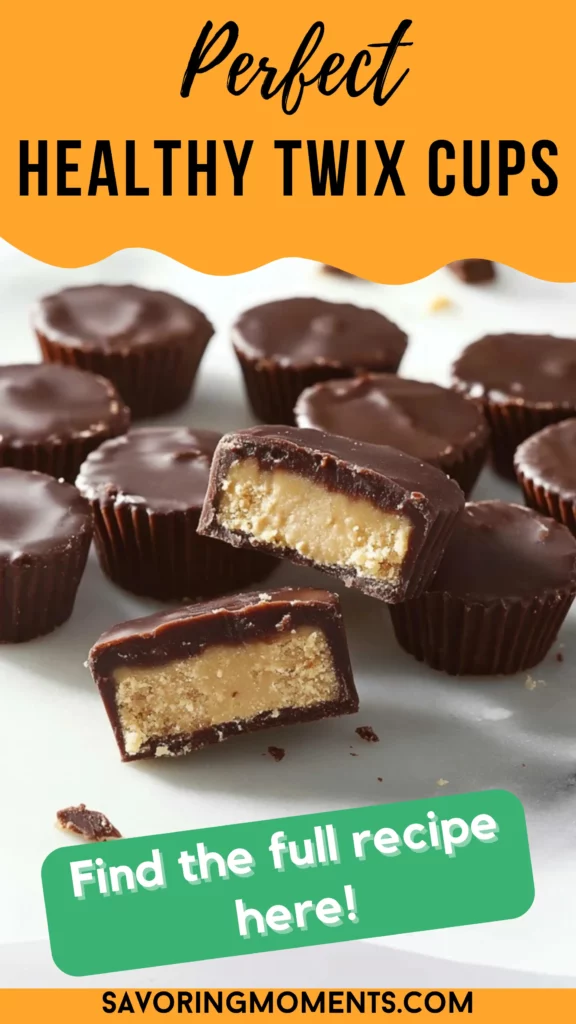
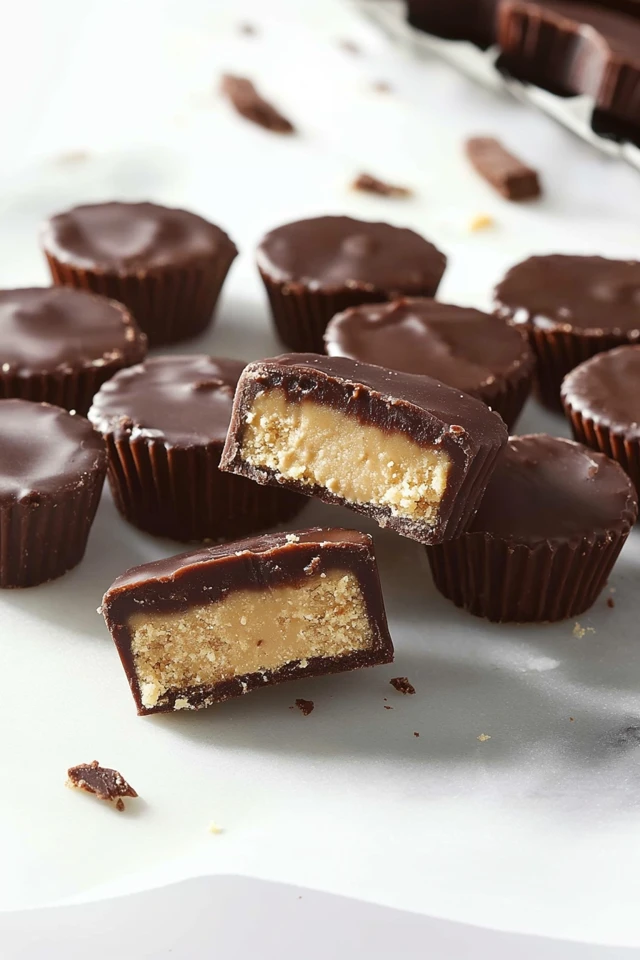
- Perfectly layered textures: soft cookie, gooey caramel, and a crisp chocolate top.
- No refined sugars or artificial ingredients.
- Easy to customize with your favorite nut or seed butters.
- Freezer-friendly and perfect for meal prepping sweet treats.
INGREDIENTS YOU’LL NEED
Base Layer:
- 1 cup almond flour
- 2 tablespoons maple syrup
- 2 tablespoons coconut oil, melted
- 1 teaspoon vanilla extract
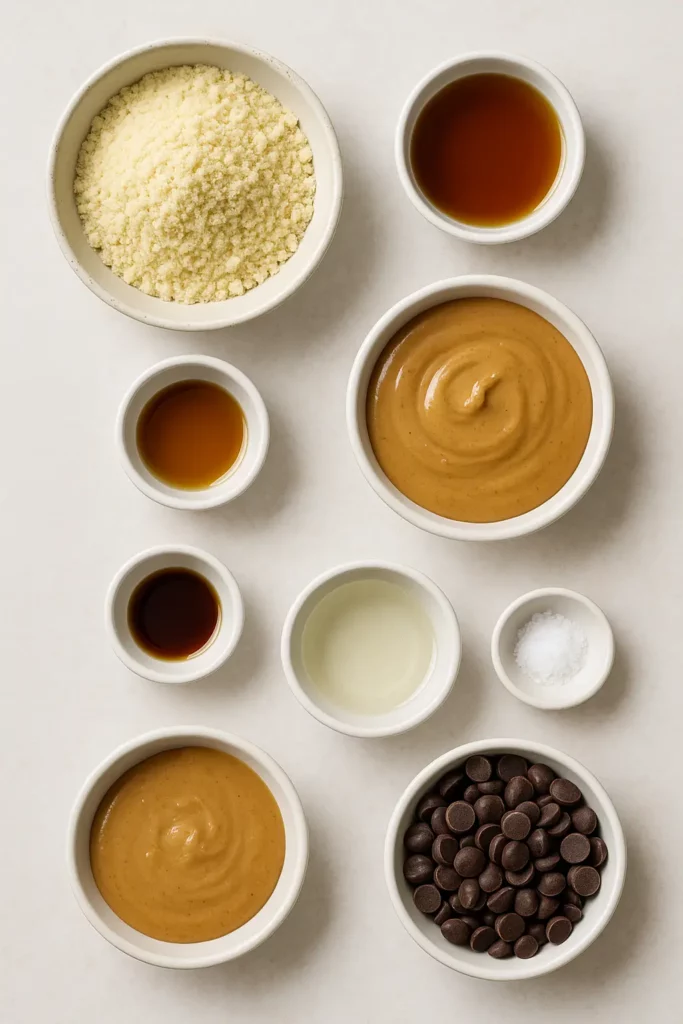
Caramel Layer:
- ½ cup almond butter (or seed butter)
- ¼ cup maple syrup
- 2 tablespoons coconut oil, melted
- 1 teaspoon vanilla extract
- Pinch of sea salt
Chocolate Layer:
- ¾ cup dark chocolate chips
- 1 tablespoon coconut oil
HOW TO MAKE Healthy Twix Cups
STEP-BY-STEP INSTRUCTIONS
Step 1: Prepare the Base Layer
In a mixing bowl, stir together the almond flour, maple syrup, melted coconut oil, and vanilla extract until a crumbly dough forms. Line a mini muffin pan with liners, then press about 1 tablespoon of dough into the bottom of each liner. Freeze for 10-15 minutes to firm up.
Step 2: Make the Caramel Layer
In another bowl, whisk the almond butter, maple syrup, melted coconut oil, vanilla extract, and a pinch of sea salt until smooth and creamy. Spoon about 1 tablespoon of the caramel onto each frozen base and spread evenly. Return to the freezer for another 10-15 minutes.
Step 3: Melt the Chocolate Layer
Melt the dark chocolate chips and coconut oil together using a double boiler or microwave in 30-second increments, stirring between each. Spoon a layer of melted chocolate over the caramel in each cup.
Step 4: Final Chill
Place the finished cups back into the freezer for 20-30 minutes or until fully set. Once hardened, they can be transferred to the fridge for easier snacking.
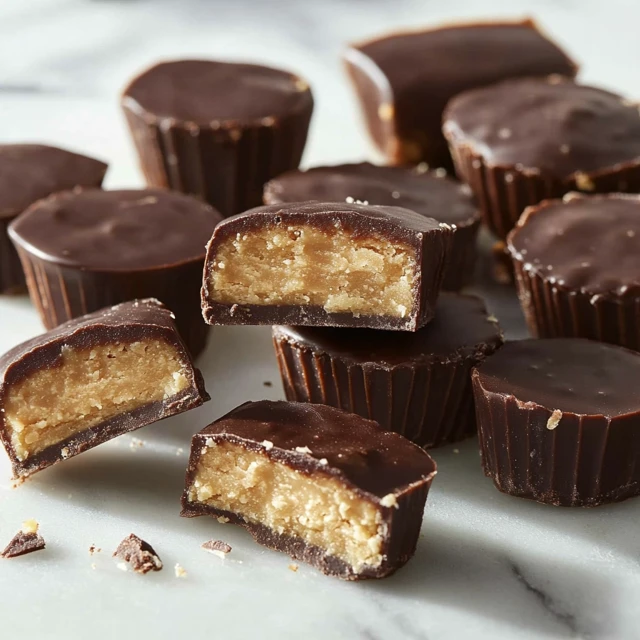
These Healthy Twix Cups are best enjoyed slightly chilled, where each bite gives you that satisfying snap of chocolate followed by gooey caramel and a tender cookie bottom.
HELPFUL TIPS
- Nut-Free Option: Swap almond butter for sunflower seed butter and almond flour for oat flour to make them nut-free.
- Flavor Boost: Sprinkle a few sea salt flakes on top of the chocolate layer for a salty-sweet kick.
- Make Ahead: These cups freeze beautifully and can last up to a month in an airtight container.
DETAILS
- Prep Time: 25 minutes
- Cook Time: 0 minutes
- Total Time: 50 minutes (including chill time)
- Yield: 12 mini cups
- Category: Dessert, Snack
- Method: No-bake
- Cuisine: American
- Diet: Vegan, Gluten-Free
NOTES
For the best flavor, use high-quality dark chocolate and real maple syrup. Always taste the caramel layer before layering to adjust sweetness if needed.
NUTRITIONAL INFORMATION
(Approximate per cup)
- Calories: 180
- Protein: 4g
- Fat: 14g
- Carbohydrates: 12g
- Fiber: 2g
- Sugar: 8g
FREQUENTLY ASKED QUESTIONS
Can I use another flour for the base?
Yes! Oat flour or coconut flour can work, but adjust the quantity as they absorb moisture differently.
What is the best way to store Healthy Twix Cups?
Keep them in an airtight container in the fridge for up to 1 week or in the freezer for up to a month.
Can I make a larger version?
Absolutely! Press the layers into a parchment-lined loaf pan and slice into bars once set.
STORAGE INSTRUCTIONS
Store Healthy Twix Cups in an airtight container in the refrigerator for up to 7 days. For longer storage, freeze them for up to 1 month, separating layers with parchment paper to prevent sticking.
Related Recipes
If you liked this recipe, you will definitely enjoy these other healthy treats:
- Almond Joy Coconut Bites
- Almond Croissant Blondies
- Key Lime Cheesecake
- Lime Frosted Coconut Bars (Starbucks Copycat)
CONCLUSION
There is something magical about recreating your favorite childhood treats with better-for-you ingredients. These Healthy Twix Cups capture that perfect balance of indulgence and nourishment, making them a must-try for anyone looking to treat themselves without compromising their wellness journey. Whether you are cozying up under a blanket with a good book or hosting a gathering with friends, these little bites of joy are sure to make every moment sweeter.
Print
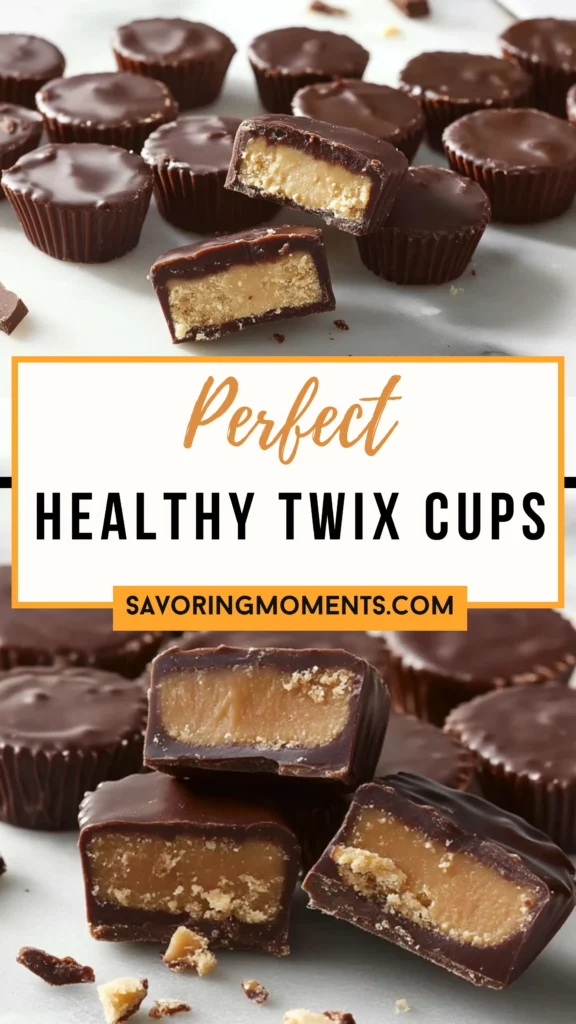
Healthy Twix Cups
Description
When the days grow shorter and the air carries that crisp hint of fall, there is something utterly comforting about indulging in a treat that reminds you of simpler times. For me, Twix bars were a childhood favorite—the perfect combination of buttery cookie, smooth caramel, and rich chocolate. As I grew older and more conscious about my health, I longed for a version that could deliver the same joy without the sugar crash. That is when I discovered Healthy Twix Cups.
These delightful little cups bring together everything you love about the classic candy bar but with wholesome, nourishing ingredients. They have quickly become a seasonal staple in my kitchen, especially around Halloween and cozy movie nights. The rich layers are not only incredibly satisfying but also feel indulgent while staying true to a more natural, plant-based lifestyle.
The cultural significance of reinventing beloved classics into healthier versions reflects a broader movement towards mindful eating—honoring both tradition and wellness. Whether you’re sharing them at a fall gathering or keeping a secret stash in your fridge, Healthy Twix Cups are a bite-sized celebration of comfort, nostalgia, and nourishment.
Ingredients
Base Layer:
1 cup almond flour
2 tablespoons maple syrup
2 tablespoons coconut oil, melted
1 teaspoon vanilla extract
Caramel Layer:
½ cup almond butter (or seed butter)
¼ cup maple syrup
2 tablespoons coconut oil, melted
1 teaspoon vanilla extract
Pinch of sea salt
Chocolate Layer:
¾ cup dark chocolate chips
1 tablespoon coconut oil
Instructions
Step 1: Prepare the Base Layer
In a mixing bowl, stir together the almond flour, maple syrup, melted coconut oil, and vanilla extract until a crumbly dough forms. Line a mini muffin pan with liners, then press about 1 tablespoon of dough into the bottom of each liner. Freeze for 10-15 minutes to firm up.
Step 2: Make the Caramel Layer
In another bowl, whisk the almond butter, maple syrup, melted coconut oil, vanilla extract, and a pinch of sea salt until smooth and creamy. Spoon about 1 tablespoon of the caramel onto each frozen base and spread evenly. Return to the freezer for another 10-15 minutes.
Step 3: Melt the Chocolate Layer
Melt the dark chocolate chips and coconut oil together using a double boiler or microwave in 30-second increments, stirring between each. Spoon a layer of melted chocolate over the caramel in each cup.
Step 4: Final Chill
Place the finished cups back into the freezer for 20-30 minutes or until fully set. Once hardened, they can be transferred to the fridge for easier snacking.
These Healthy Twix Cups are best enjoyed slightly chilled, where each bite gives you that satisfying snap of chocolate followed by gooey caramel and a tender cookie bottom.
Notes
For the best flavor, use high-quality dark chocolate and real maple syrup. Always taste the caramel layer before layering to adjust sweetness if needed.