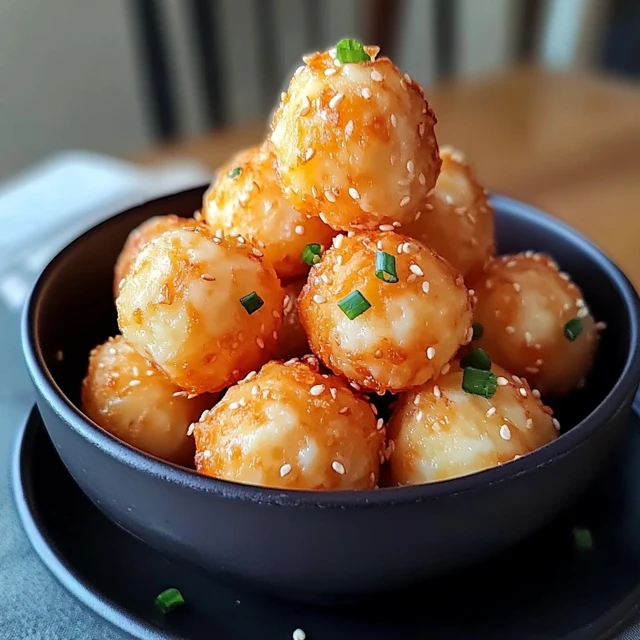
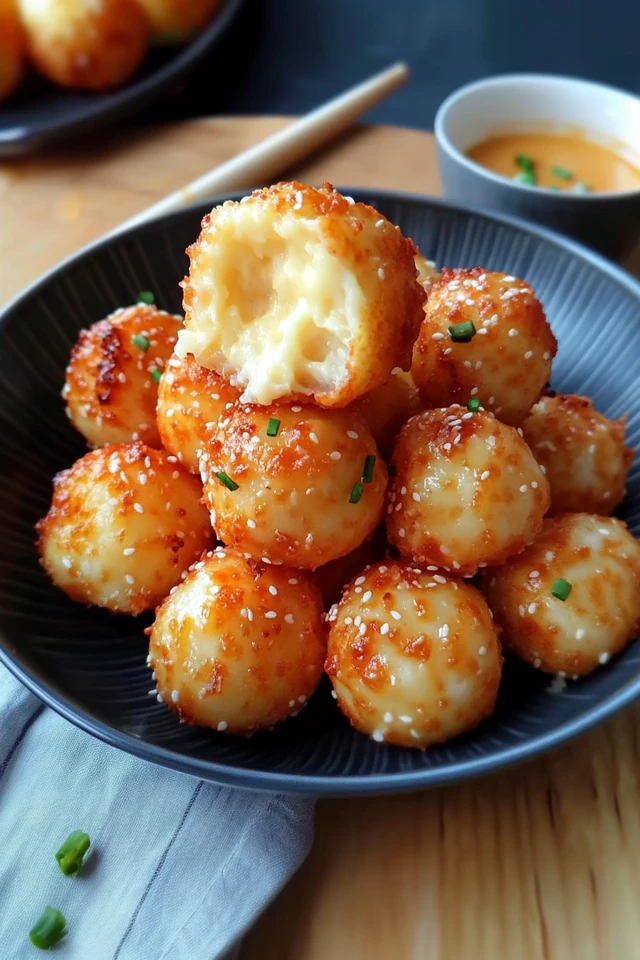
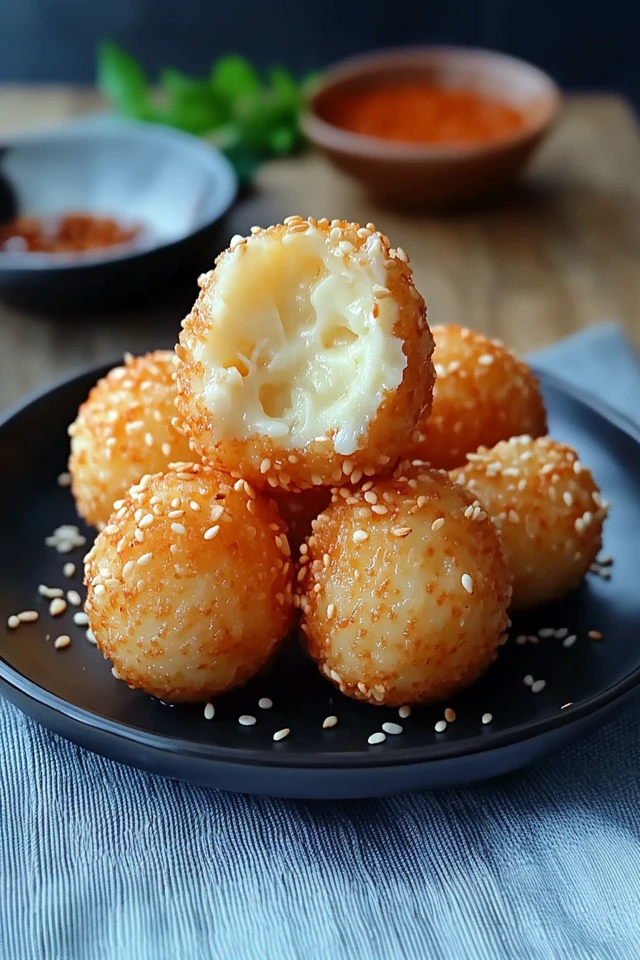
If you’ve ever wandered the streets of Seoul or browsed a Korean café menu, you might have come across these crispy, golden cheese balls—an absolute treat that’s both crunchy on the outside and irresistibly gooey inside. Korean cheese balls have taken the snack world by storm, becoming a favorite in bakeries, street food stalls, and even home kitchens.
These delightful bites are a perfect mix of sweet and savory, thanks to their slightly sugary dough and the rich, melty cheese center. They’re often served alongside Korean fried chicken or as a snack on their own. Whether you’re making them for a cozy movie night, a fun party snack, or just to treat yourself, these cheese balls will have everyone reaching for seconds.
Why You’ll Love This Recipe
- Crispy, Cheesy Goodness – The contrast between the crunchy outer shell and the gooey, melted cheese inside makes these balls incredibly satisfying.
- Easy to Make at Home – You don’t need any fancy ingredients or equipment, just a bit of patience and a love for cheese.
- Customizable – Use different cheeses, adjust the sweetness, or even experiment with coatings like breadcrumbs for added crunch.
- Perfect Party Snack – These cheese balls will be a hit at any gathering, whether it’s a game night, potluck, or family get-together.

Ingredients You’ll Need
For the Dough:
- 2 cups glutinous rice flour
- ¼ cup sugar
- ½ teaspoon salt
- 1 teaspoon baking powder
- ½ cup warm milk
- 2 tablespoons melted butter
For the Filling:
- 1 ½ cups mozzarella cheese, cut into cubes
For Coating & Frying:
- ½ cup cornstarch
- Oil, for frying

How to Make Korean Cheese Balls
Making these cheese balls at home is simpler than you might think! Follow these step-by-step instructions for the perfect crispy, cheesy bite.
Step 1: Prepare the Dough
Start by combining the glutinous rice flour, sugar, salt, and baking powder in a mixing bowl. Give it a quick whisk to ensure everything is evenly distributed. Slowly pour in the warm milk while stirring, then add the melted butter.
Using your hands, knead the mixture until a soft, slightly sticky dough forms. If it feels too dry, add a little more milk, one teaspoon at a time. The dough should be smooth and pliable but not overly sticky.
Step 2: Shape the Cheese Balls
Cut your mozzarella cheese into small cubes, about ½ inch in size. Take a small portion of the dough (about the size of a ping-pong ball) and flatten it in your palm. Place a cheese cube in the center, then gently wrap the dough around it, sealing it completely.
Roll the dough between your palms to form a smooth ball. Repeat with the remaining dough and cheese.
Step 3: Coat the Balls
Pour the cornstarch into a shallow dish and roll each ball in it until fully coated. This helps create an extra crispy outer layer when fried. Shake off any excess cornstarch.
Step 4: Fry to Perfection
Heat oil in a deep pan over medium heat. To test if the oil is ready, drop a small piece of dough into it—if it sizzles and floats to the top, you’re good to go.
Carefully place the cheese balls into the hot oil, frying in small batches to avoid overcrowding. Fry for about 3–4 minutes, turning occasionally, until they turn golden brown and crispy.
Use a slotted spoon to transfer the cheese balls to a plate lined with paper towels to drain excess oil.
Step 5: Serve and Enjoy
Let the cheese balls cool for a minute or two before taking a bite—trust me, the cheese inside will be molten hot! Serve them as is, or pair them with a side of sweet chili sauce, honey butter, or spicy mayo for an extra flavor kick.

Helpful Tips
- Seal the Dough Well – Make sure there are no openings in the dough, or the cheese might leak out while frying.
- Use Fresh Mozzarella – Low-moisture mozzarella works best, as it melts beautifully without releasing too much liquid.
- Adjust Sweetness to Taste – Traditional Korean cheese balls have a hint of sweetness in the dough. If you prefer them less sweet, reduce the sugar slightly.
- Reheat Like a Pro – If you have leftovers, pop them in the air fryer for a few minutes to bring back the crispy texture.
Recipe Details
- Prep Time: 15 minutes
- Cook Time: 10 minutes
- Total Time: 25 minutes
- Yield: 12 cheese balls
- Category: Snack/Appetizer
- Method: Deep Frying
- Cuisine: Korean
- Diet: Vegetarian

Notes
- If you want an extra crispy exterior, you can double-coat the cheese balls by dipping them in a thin batter (flour and water mixture) before rolling them in cornstarch.
- Experiment with different cheese types like cheddar or gouda for a unique twist.
Nutritional Information (Per Cheese Ball)
- Calories: 120
- Carbohydrates: 15g
- Protein: 4g
- Fat: 5g
- Saturated Fat: 3g
- Cholesterol: 10mg
- Sodium: 120mg
- Fiber: 0.5g
- Sugar: 3g
Frequently Asked Questions
Can I bake these instead of frying?
While frying gives them that signature crispy texture, you can bake them at 375°F (190°C) for about 15–18 minutes. They won’t be as crispy, but they’ll still be delicious!
Why is my dough too sticky or dry?
If your dough is too sticky, add a little more glutinous rice flour. If it’s too dry, mix in a teaspoon of warm milk at a time until you reach the right consistency.
Can I freeze Korean cheese balls?
Yes! Shape the cheese balls and freeze them on a tray before frying. Once frozen, transfer them to an airtight bag and store for up to a month. Fry them straight from the freezer, adding an extra minute to the frying time.
What sauces go well with cheese balls?
These cheese balls are delicious on their own, but they pair wonderfully with spicy mayo, honey mustard, or a drizzle of sweet chili sauce.
Storage Instructions
- Refrigeration: Store leftover cheese balls in an airtight container in the fridge for up to 3 days.
- Reheating: For best results, reheat them in an air fryer or oven at 350°F (175°C) for 5 minutes to regain their crispiness. Avoid microwaving, as it makes them soggy.
- Freezing: Freeze uncooked cheese balls for up to 1 month and fry them straight from the freezer when ready.

Related Recipes
If you loved these Korean Cheese Balls, check out these other cheesy delights:
Final Thoughts
Korean Cheese Balls are the perfect balance of crispy, chewy, and cheesy. Whether you’re making them for a snack, a party, or just because you’re craving something indulgent, these little bites are guaranteed to be a crowd-pleaser. Once you take that first bite into the golden crust and experience the cheesy pull, you’ll understand why these treats are so popular.
Print
Irresistible Korean Cheese Balls
Description
If you’ve ever wandered the streets of Seoul or browsed a Korean café menu, you might have come across these crispy, golden cheese balls—an absolute treat that’s both crunchy on the outside and irresistibly gooey inside. Korean cheese balls have taken the snack world by storm, becoming a favorite in bakeries, street food stalls, and even home kitchens.
These delightful bites are a perfect mix of sweet and savory, thanks to their slightly sugary dough and the rich, melty cheese center. They’re often served alongside Korean fried chicken or as a snack on their own. Whether you’re making them for a cozy movie night, a fun party snack, or just to treat yourself, these cheese balls will have everyone reaching for seconds.
Ingredients
For the Dough:
- 2 cups glutinous rice flour
- ¼ cup sugar
- ½ teaspoon salt
- 1 teaspoon baking powder
- ½ cup warm milk
- 2 tablespoons melted butter
For the Filling:
- 1 ½ cups mozzarella cheese, cut into cubes
For Coating & Frying:
- ½ cup cornstarch
- Oil, for frying
Instructions
Start by combining the glutinous rice flour, sugar, salt, and baking powder in a mixing bowl. Give it a quick whisk to ensure everything is evenly distributed. Slowly pour in the warm milk while stirring, then add the melted butter.
Using your hands, knead the mixture until a soft, slightly sticky dough forms. If it feels too dry, add a little more milk, one teaspoon at a time. The dough should be smooth and pliable but not overly sticky.
Cut your mozzarella cheese into small cubes, about ½ inch in size. Take a small portion of the dough (about the size of a ping-pong ball) and flatten it in your palm. Place a cheese cube in the center, then gently wrap the dough around it, sealing it completely.
Roll the dough between your palms to form a smooth ball. Repeat with the remaining dough and cheese.
Pour the cornstarch into a shallow dish and roll each ball in it until fully coated. This helps create an extra crispy outer layer when fried. Shake off any excess cornstarch.
Heat oil in a deep pan over medium heat. To test if the oil is ready, drop a small piece of dough into it—if it sizzles and floats to the top, you’re good to go.
Carefully place the cheese balls into the hot oil, frying in small batches to avoid overcrowding. Fry for about 3–4 minutes, turning occasionally, until they turn golden brown and crispy.
Use a slotted spoon to transfer the cheese balls to a plate lined with paper towels to drain excess oil.
Let the cheese balls cool for a minute or two before taking a bite—trust me, the cheese inside will be molten hot! Serve them as is, or pair them with a side of sweet chili sauce, honey butter, or spicy mayo for an extra flavor kick.
Notes
- If you want an extra crispy exterior, you can double-coat the cheese balls by dipping them in a thin batter (flour and water mixture) before rolling them in cornstarch.
- Experiment with different cheese types like cheddar or gouda for a unique twist.


