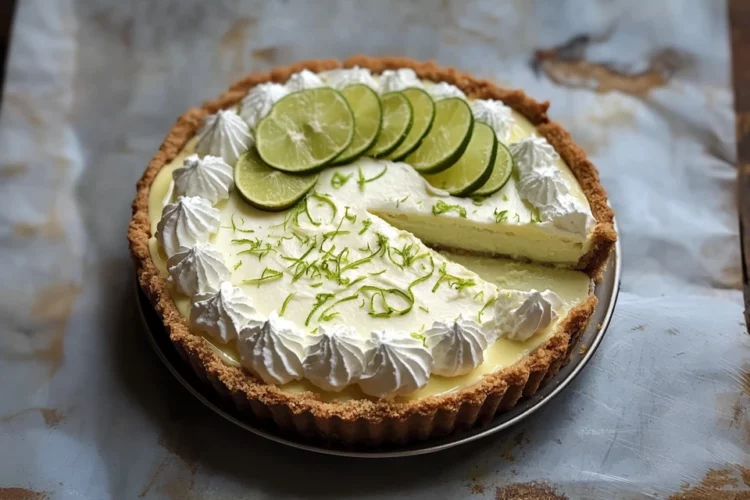
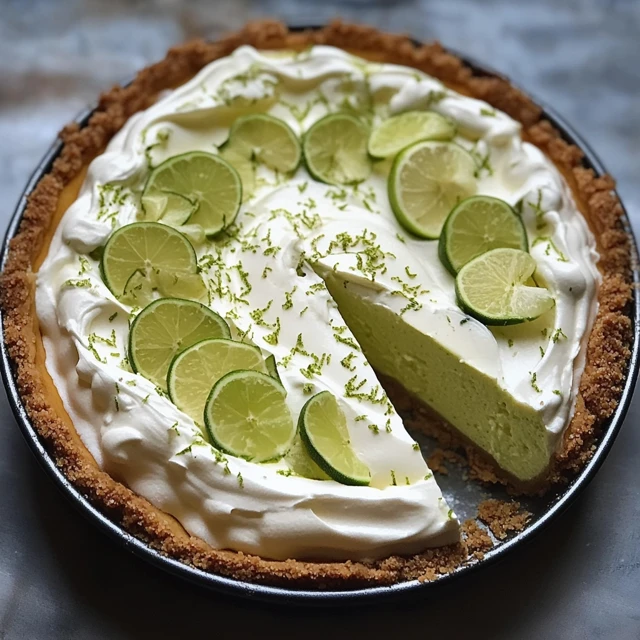
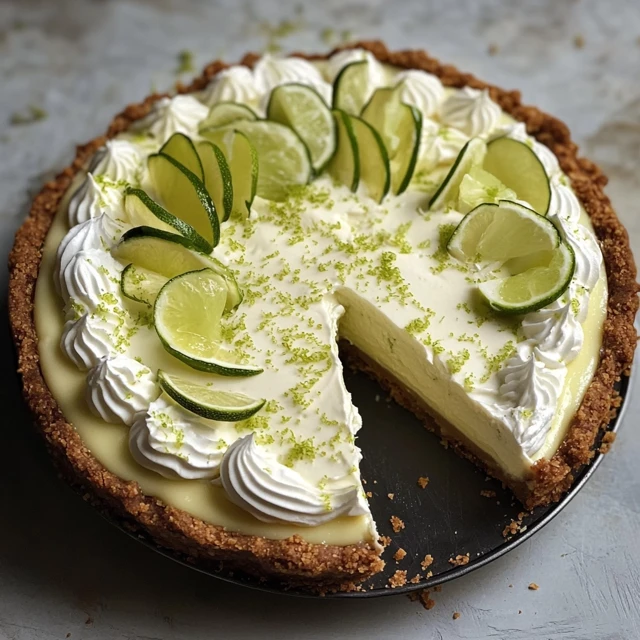
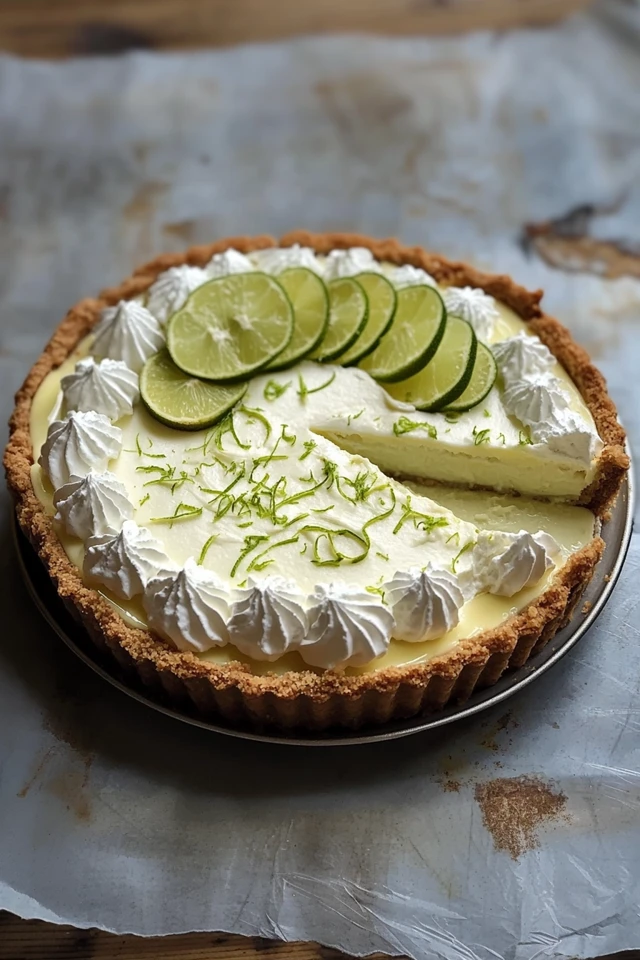
There’s something magical about a dessert that can instantly transport you to a warm, breezy beach with just one bite. Key Lime Pie does exactly that. With its bright citrus tang and creamy, luscious filling, this pie is like a little slice of summer sunshine—no matter what season you’re in.

Traditionally tied to the Florida Keys, this pie has roots that date back to the early 20th century when canned milk became a pantry staple in the region due to lack of refrigeration. The original recipe was incredibly simple: key lime juice, egg yolks, and sweetened condensed milk, all nestled in a graham cracker crust. It didn’t even require baking! Today, we usually give it a quick bake for safety and structure, but the heart of the pie—the bold, tart flavor and silky-smooth texture—remains unchanged.
For me, Key Lime Pie always makes an appearance around springtime. It’s my go-to dessert for Easter brunches, backyard get-togethers, and those first warm days when you’re craving something cool, bright, and refreshing. The way the creamy filling pairs with the slightly salty, crunchy crust is pure magic. Add a cloud of whipped cream on top? Absolute perfection.
Why You’ll Love This Recipe:
- The filling is creamy, tangy, and perfectly balanced—sweet but not overpowering
- It uses simple ingredients you likely already have in your kitchen
- The graham cracker crust adds the perfect touch of crunch and contrast
- It’s make-ahead friendly and gets even better after chilling overnight
- A refreshing, crowd-pleasing dessert for spring and summer
INGREDIENTS YOU’LL NEED:
For the crust:
- 200g (about 13) graham crackers
- 1 tablespoon sugar
- ½ teaspoon fine sea salt
- 6 tablespoons unsalted butter, melted
For the filling:
- 3 large egg yolks
- 1 can (14 oz) sweetened condensed milk
- ½ cup key lime juice (fresh or bottled)
- Zest of 1 lime
For the topping:
- ¾ cup heavy cream
- 1 tablespoon powdered sugar
- ½ teaspoon vanilla extract

HOW TO MAKE KEY LIME PIE:
STEP-BY-STEP INSTRUCTIONS:
Step 1: Preheat and prep your pan
Set your oven to 350°F (175°C). Grab a 9-inch pie pan and set it aside. No need to grease it—the buttery crust won’t stick.
Step 2: Make the crust
In a food processor, blitz the graham crackers into fine crumbs. You’re aiming for sand-like texture here. Add in the sugar and salt, give it another quick pulse, then pour in the melted butter. Blend until all the crumbs are evenly coated and start to clump slightly.
Press the mixture firmly into your pie dish, using the back of a spoon or your fingers to build up the sides. Bake the crust for about 10 minutes until golden and fragrant. Let it cool slightly while you work on the filling.
Step 3: Mix the filling
In a mixing bowl, whisk the egg yolks until they’re smooth and pale—this step helps make the filling extra silky. Stir in the sweetened condensed milk, key lime juice, and lime zest. The mixture will begin to thicken slightly—this is totally normal and part of the magic.
Step 4: Fill and bake
Pour the filling into the warm crust and smooth out the top. Bake for about 15 minutes—just until the edges are set and the center has a slight jiggle. It might not look fully done, but it will firm up as it cools.
Step 5: Chill
Let the pie cool to room temperature, then pop it in the fridge for at least 4 hours (overnight is even better). This chilling time is essential for that perfect, creamy set.
Step 6: Whip and top
Just before serving, whip your cream with the powdered sugar and vanilla until soft peaks form. You can either dollop it generously over the pie or pipe it around the edges for a more polished look.
Step 7: Slice and enjoy
Grab a sharp knife, slice into that perfectly chilled pie, and serve up your first taste of zesty, creamy goodness.
HELPFUL TIPS:
- No key limes? No problem. Bottled key lime juice or regular fresh lime juice work great. Just be sure it’s 100% juice.
- Make ahead magic: This pie tastes even better the next day. The chill time gives the flavors a chance to meld beautifully.
- Whipping cream tip: Keep your bowl and beaters cold for the fluffiest whipped cream.
- Zest smartly: Zest the lime before juicing. It’s almost impossible the other way around!
DETAILS:
- Prep Time: 20 minutes
- Cook Time: 25 minutes
- Total Time: 4 hours 45 minutes (includes chilling)
- Yield: 1 pie (8 servings)
- Category: Dessert
- Method: Baking
- Cuisine: American
- Diet: Vegetarian

NOTES:
- The crust can be made up to two days in advance and stored at room temperature, tightly covered.
- If you prefer a lighter crust, reduce the butter by 1 tablespoon.
- For individual servings, try making this recipe in mini tart pans or ramekins.
NUTRITIONAL INFORMATION: (Approximate per slice)
- Calories: 340
- Fat: 19g
- Saturated Fat: 11g
- Carbohydrates: 38g
- Sugar: 29g
- Protein: 5g
FREQUENTLY ASKED QUESTIONS:
Can I use regular limes instead of key limes?
Yes! While key limes have a more intense, floral flavor, regular limes are a fine substitute and make this pie just as delicious.
How long does Key Lime Pie last?
It’ll keep in the fridge for up to 4 days. Just be sure to cover it tightly so it doesn’t absorb any fridge odors.
Can I freeze Key Lime Pie?
You can! Freeze the pie (without the whipped topping) for up to 2 months. Thaw overnight in the fridge before serving, then add fresh whipped cream.
STORAGE INSTRUCTIONS:
Store any leftovers in the refrigerator, covered with plastic wrap or in an airtight container. It’s best enjoyed within 3 to 4 days. If making ahead, hold off on the whipped topping until you’re ready to serve for best texture and presentation.
Related Recipes
If you liked this recipe, you’ll definitely enjoy these other zesty delights:
- Light & Fluffy Yogurt Cloud Cake
- Japanese Cheese Tarts
- Vegan Blue Moon Lime Tart
- Strawberry Crunch Brownies
CONCLUSION
There’s a reason Key Lime Pie has remained a classic for generations—it’s simple, stunning, and downright refreshing. Whether you’re serving it at a summer barbecue, a spring gathering, or just as a mid-week pick-me-up, this pie brings brightness to any occasion. And with how easy it is to make, you’ll want to keep it on repeat all season long.
Print
Key Lime Pie: A Tangy-Sweet Slice of Sunshine
Description
There’s something magical about a dessert that can instantly transport you to a warm, breezy beach with just one bite. Key Lime Pie does exactly that. With its bright citrus tang and creamy, luscious filling, this pie is like a little slice of summer sunshine—no matter what season you’re in.
Traditionally tied to the Florida Keys, this pie has roots that date back to the early 20th century when canned milk became a pantry staple in the region due to lack of refrigeration. The original recipe was incredibly simple: key lime juice, egg yolks, and sweetened condensed milk, all nestled in a graham cracker crust. It didn’t even require baking! Today, we usually give it a quick bake for safety and structure, but the heart of the pie—the bold, tart flavor and silky-smooth texture—remains unchanged.
For me, Key Lime Pie always makes an appearance around springtime. It’s my go-to dessert for Easter brunches, backyard get-togethers, and those first warm days when you’re craving something cool, bright, and refreshing. The way the creamy filling pairs with the slightly salty, crunchy crust is pure magic. Add a cloud of whipped cream on top? Absolute perfection.
Ingredients
For the crust:
200g (about 13) graham crackers
1 tablespoon sugar
½ teaspoon fine sea salt
6 tablespoons unsalted butter, melted
For the filling:
3 large egg yolks
1 can (14 oz) sweetened condensed milk
½ cup key lime juice (fresh or bottled)
Zest of 1 lime
For the topping:
¾ cup heavy cream
1 tablespoon powdered sugar
½ teaspoon vanilla extract
Instructions
Step 1: Preheat and prep your pan
Set your oven to 350°F (175°C). Grab a 9-inch pie pan and set it aside. No need to grease it—the buttery crust won’t stick.
Step 2: Make the crust
In a food processor, blitz the graham crackers into fine crumbs. You’re aiming for sand-like texture here. Add in the sugar and salt, give it another quick pulse, then pour in the melted butter. Blend until all the crumbs are evenly coated and start to clump slightly.
Press the mixture firmly into your pie dish, using the back of a spoon or your fingers to build up the sides. Bake the crust for about 10 minutes until golden and fragrant. Let it cool slightly while you work on the filling.
Step 3: Mix the filling
In a mixing bowl, whisk the egg yolks until they’re smooth and pale—this step helps make the filling extra silky. Stir in the sweetened condensed milk, key lime juice, and lime zest. The mixture will begin to thicken slightly—this is totally normal and part of the magic.
Step 4: Fill and bake
Pour the filling into the warm crust and smooth out the top. Bake for about 15 minutes—just until the edges are set and the center has a slight jiggle. It might not look fully done, but it will firm up as it cools.
Step 5: Chill
Let the pie cool to room temperature, then pop it in the fridge for at least 4 hours (overnight is even better). This chilling time is essential for that perfect, creamy set.
Step 6: Whip and top
Just before serving, whip your cream with the powdered sugar and vanilla until soft peaks form. You can either dollop it generously over the pie or pipe it around the edges for a more polished look.
Step 7: Slice and enjoy
Grab a sharp knife, slice into that perfectly chilled pie, and serve up your first taste of zesty, creamy goodness.
Notes
-
The crust can be made up to two days in advance and stored at room temperature, tightly covered.
-
If you prefer a lighter crust, reduce the butter by 1 tablespoon.
-
For individual servings, try making this recipe in mini tart pans or ramekins.