
There’s something so magical about desserts that come with layers—each spoonful tells a story, with creamy textures, sweet surprises, and nostalgic flavors that make you want to go back for just one more bite. That’s exactly what makes this Lotus Biscoff Dessert Lasagna such a beloved treat. It’s not just a dessert—it’s an experience.
This particular recipe took social media by storm, thanks to Walla Abu-Eid, a talented baker and food creator from Sydney, Australia. She first shared this recipe as a simple family favorite, but it quickly became a global hit for good reason. It’s rich, creamy, no-bake, and so ridiculously easy to make that even beginner bakers can whip it up without breaking a sweat.

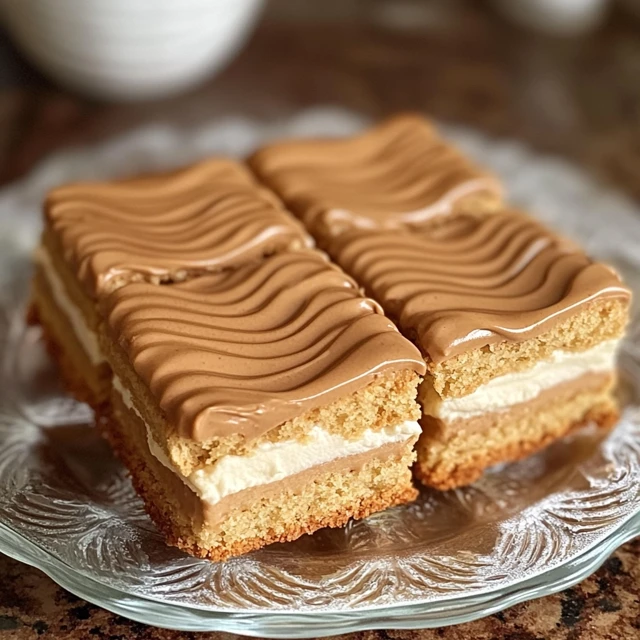
At its heart, this dessert layers soft, coffee-dipped Biscoff biscuits with a cloud-like whipped cream and cream cheese filling, all topped off with a velvety Biscoff spread drizzle. Every bite melts in your mouth—sweet, spiced, and utterly indulgent. Perfect for gatherings, celebrations, or those moments when you need a little comfort in dessert form.
Whether you’re introducing someone to the wonders of Biscoff for the first time, or you’re already a lifelong fan of that caramelized, spiced cookie flavor, this dessert is a showstopper. It’s also totally customizable, which means you can make it your own with little tweaks here and there.
Let’s dive into this sweet, dreamy creation.
Why You’ll Love This Recipe:
- No-bake and effortless – No oven required!
- Perfectly indulgent – Rich layers of creamy goodness with a cookie crunch.
- Crowd-pleasing – It’s always a hit at potlucks, birthdays, or holiday tables.
- Make-ahead friendly – In fact, it’s even better after chilling overnight.
- Full of that Biscoff magic – If you know, you know.
INGREDIENTS YOU’LL NEED:
- 500g cream cheese, softened
- 600ml thickened cream
- 1 cup powdered sugar
- 1 tsp vanilla extract
- 2 packs (approx. 250g) Lotus Biscoff biscuits
- 1 cup milk (for dipping biscuits)
- 1/2 cup Lotus Biscoff spread (melted for drizzling)
- Extra Biscoff biscuits (crushed, for topping)

HOW TO MAKE LOTUS BISCOFF DESSERT LASAGNA:
STEP-BY-STEP INSTRUCTIONS:
Step 1: Whip up the creamy filling
Start by combining the cream cheese and powdered sugar in a large mixing bowl. Beat until smooth and fluffy—this is your foundation, so take your time to get it nice and creamy. Add the vanilla extract, then slowly pour in the thickened cream. Whip it all together until soft peaks form. You’re looking for a light, luscious texture that holds its shape.
Step 2: Get dipping
Pour the milk into a shallow bowl. This is where the Biscoff biscuits get their soft, cake-like texture. Dip each biscuit briefly into the milk—just a quick dip on each side so they don’t get too soggy. Then, start lining the bottom of a rectangular baking dish (about 9×13 inches) with the dipped biscuits, creating your first layer.
Step 3: Layer on the goodness
Spread a thick layer of your whipped cream cheese mixture over the biscuit base. Use a spatula to smooth it out evenly. Repeat the layers—dip, layer biscuits, and spread cream—until you’ve used all the filling. Aim for at least 3 layers, but 2 will do if your dish is smaller.
Step 4: Drizzle and decorate
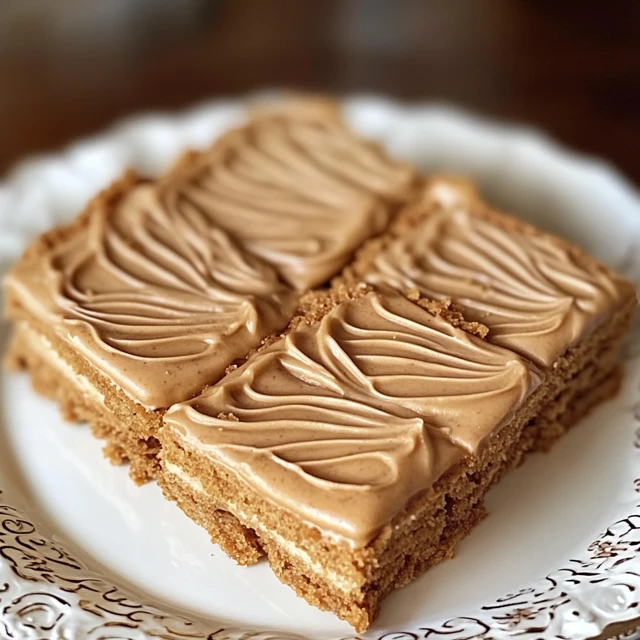
Melt the Biscoff spread gently (just pop it in the microwave for 15-20 seconds), then drizzle it generously over the top. Add a final flourish by sprinkling crushed Biscoff biscuits across the surface for a bit of crunch.
Step 5: Chill out
This dessert needs time to set, so pop it in the fridge for at least 4 hours—overnight is even better. That way, the layers meld beautifully and the flavors really come through.
When it’s time to serve, slice into it just like you would with a classic lasagna. Each piece will hold its shape and reveal those dreamy, creamy layers.
HELPFUL TIPS:
- Use full-fat cream cheese for the creamiest texture.
- Don’t over-dip the biscuits in milk—they should soften, not fall apart.
- Chill overnight if you can—it really does make the flavors pop.
- Warm the Biscoff spread gently so it pours easily and creates that gorgeous drizzle.
- Want to add a little crunch? Fold in some crushed biscuits to one of the middle layers!
DETAILS:
- Prep Time: 20 minutes
- Chill Time: 4 hours (or overnight)
- Total Time: 4 hours 20 minutes
- Yield: Serves 10–12
- Category: Dessert
- Method: No-bake
- Cuisine: Modern Fusion
- Diet: Vegetarian

NOTES:
This dessert can easily be made in advance, making it perfect for entertaining. You can also experiment with flavors—try adding a pinch of cinnamon or layering in some berries for a fresh twist.
NUTRITIONAL INFORMATION: (Estimated per serving)
- Calories: 430
- Carbohydrates: 36g
- Protein: 4g
- Fat: 30g
- Saturated Fat: 18g
- Sugar: 22g
- Fiber: 1g
- Sodium: 190mg
FREQUENTLY ASKED QUESTIONS:
Can I use whipped topping instead of heavy cream?
Yes, you can substitute with store-bought whipped topping, but the flavor and texture are richer with fresh cream.
How long does this last in the fridge?
It keeps beautifully for up to 4 days in the refrigerator. Just cover it well with plastic wrap or an airtight lid.
Can I freeze it?
Technically, yes—but the texture might change slightly after thawing. If you do freeze it, let it thaw overnight in the fridge before serving.
What can I use instead of Biscoff biscuits?
If you can’t find Biscoff, you can try speculoos or other spiced cookies with a similar flavor.
STORAGE INSTRUCTIONS:
Store leftovers in an airtight container in the fridge. It’s best enjoyed within 3–4 days, but we doubt it’ll last that long! Avoid freezing if you want to maintain that smooth, creamy texture.

Related Recipes
If you liked this recipe, you’ll definitely enjoy these other cheesy delights:
- Biscoff Salted Caramel Cheesecake
- Mini Biscoff Cookie Butter Cheesecakes
- Creamy Biscoff Cheesecake – A Dreamy, Spiced Delight
- Mini Cinnamon Roll Cheesecakes
CONCLUSION
The Lotus Biscoff Dessert Lasagna is more than just a trend—it’s a dessert that brings people together. It’s simple to make, easy to love, and perfect for any occasion, from birthdays to just-because cravings. With its smooth layers, sweet spiced flavor, and no-fuss method, it’s bound to become one of your go-to desserts.
Print
Lotus Biscoff Dessert Lasagna
Description
There’s something so magical about desserts that come with layers—each spoonful tells a story, with creamy textures, sweet surprises, and nostalgic flavors that make you want to go back for just one more bite. That’s exactly what makes this Lotus Biscoff Dessert Lasagna such a beloved treat. It’s not just a dessert—it’s an experience.
This particular recipe took social media by storm, thanks to Walla Abu-Eid, a talented baker and food creator from Sydney, Australia. She first shared this recipe as a simple family favorite, but it quickly became a global hit for good reason. It’s rich, creamy, no-bake, and so ridiculously easy to make that even beginner bakers can whip it up without breaking a sweat.
At its heart, this dessert layers soft, coffee-dipped Biscoff biscuits with a cloud-like whipped cream and cream cheese filling, all topped off with a velvety Biscoff spread drizzle. Every bite melts in your mouth—sweet, spiced, and utterly indulgent. Perfect for gatherings, celebrations, or those moments when you need a little comfort in dessert form.
Whether you’re introducing someone to the wonders of Biscoff for the first time, or you’re already a lifelong fan of that caramelized, spiced cookie flavor, this dessert is a showstopper. It’s also totally customizable, which means you can make it your own with little tweaks here and there.
Let’s dive into this sweet, dreamy creation.
Ingredients
500g cream cheese, softened
600ml thickened cream
1 cup powdered sugar
1 tsp vanilla extract
2 packs (approx. 250g) Lotus Biscoff biscuits
1 cup milk (for dipping biscuits)
1/2 cup Lotus Biscoff spread (melted for drizzling)
Extra Biscoff biscuits (crushed, for topping)
Instructions
Step 1: Whip up the creamy filling
Start by combining the cream cheese and powdered sugar in a large mixing bowl. Beat until smooth and fluffy—this is your foundation, so take your time to get it nice and creamy. Add the vanilla extract, then slowly pour in the thickened cream. Whip it all together until soft peaks form. You’re looking for a light, luscious texture that holds its shape.
Step 2: Get dipping
Pour the milk into a shallow bowl. This is where the Biscoff biscuits get their soft, cake-like texture. Dip each biscuit briefly into the milk—just a quick dip on each side so they don’t get too soggy. Then, start lining the bottom of a rectangular baking dish (about 9×13 inches) with the dipped biscuits, creating your first layer.
Step 3: Layer on the goodness
Spread a thick layer of your whipped cream cheese mixture over the biscuit base. Use a spatula to smooth it out evenly. Repeat the layers—dip, layer biscuits, and spread cream—until you’ve used all the filling. Aim for at least 3 layers, but 2 will do if your dish is smaller.
Step 4: Drizzle and decorate
Melt the Biscoff spread gently (just pop it in the microwave for 15-20 seconds), then drizzle it generously over the top. Add a final flourish by sprinkling crushed Biscoff biscuits across the surface for a bit of crunch.
Step 5: Chill out
This dessert needs time to set, so pop it in the fridge for at least 4 hours—overnight is even better. That way, the layers meld beautifully and the flavors really come through.
When it’s time to serve, slice into it just like you would with a classic lasagna. Each piece will hold its shape and reveal those dreamy, creamy layers.
Notes
This dessert can easily be made in advance, making it perfect for entertaining. You can also experiment with flavors—try adding a pinch of cinnamon or layering in some berries for a fresh twist.