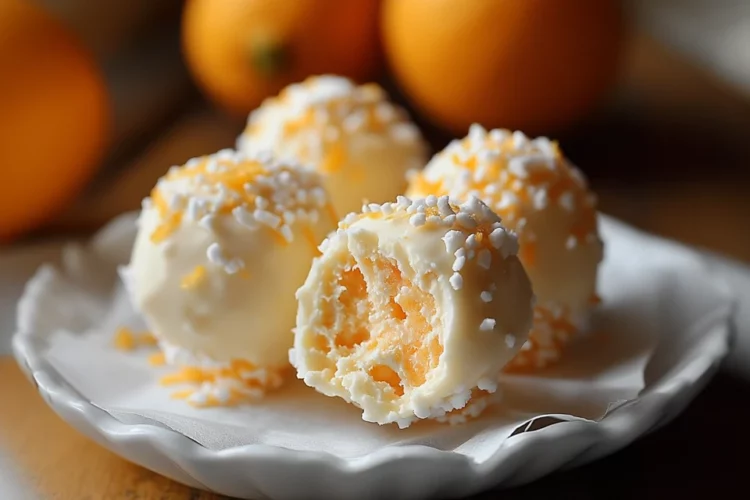
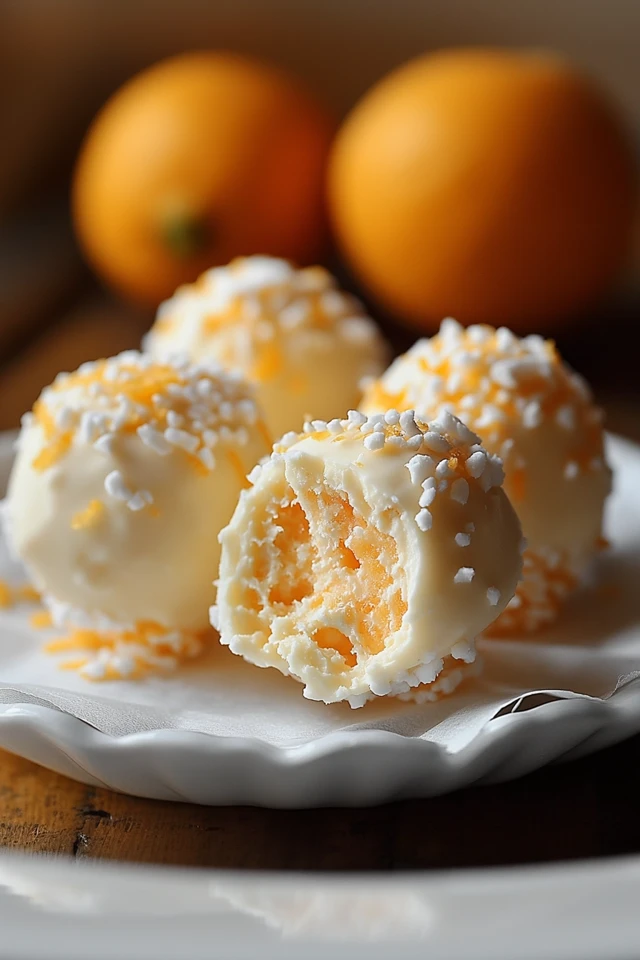
There’s something undeniably nostalgic about the classic orange creamsicle flavor—sweet, citrusy, and creamy all at once. It instantly takes you back to warm summer afternoons, chasing the ice cream truck down the street, or enjoying a refreshing frozen treat on the porch. Now, imagine capturing that same delightful flavor in a bite-sized, melt-in-your-mouth truffle.

These No-Bake Orange Creamsicle Truffles are a dreamy combination of bright orange zest, smooth white chocolate, and a luscious creamy center. They require no baking, making them the perfect treat for when you’re short on time but still want to impress. Whether you’re making them for a party, gifting them to a friend, or just treating yourself, these little bites of sunshine will be a hit!
Why You’ll Love This Recipe
- No baking required – Perfect for hot days when you don’t want to turn on the oven.
- Quick and easy – Simple ingredients and minimal prep make this recipe a breeze.
- Perfectly sweet and citrusy – The balance of orange and creamy white chocolate is pure bliss.
- Great for gifting – Pack these up in a cute box, and they make a wonderful homemade gift.
- Fun to make with kids – Rolling the truffles in powdered sugar or coconut is a great hands-on activity!
Ingredients You’ll Need
- 2 ½ cups white chocolate chips
- ½ cup heavy cream
- 1 tablespoon unsalted butter
- Zest of 1 orange
- ½ teaspoon orange extract
- ½ teaspoon vanilla extract
- ¼ teaspoon salt
- 1 cup powdered sugar (for rolling)

How to Make No-Bake Orange Creamsicle Truffles
Making these truffles is easier than you might think. With just a little mixing, chilling, and rolling, you’ll have a batch of these delicious treats ready to enjoy!
Step 1: Melt the White Chocolate
In a heatproof bowl, add the white chocolate chips. In a small saucepan, heat the heavy cream and butter over medium heat until it just starts to simmer. You don’t want it boiling—just warm enough to melt the chocolate.
Pour the warm cream mixture over the white chocolate and let it sit for about a minute. Then, stir until smooth and creamy. If needed, you can microwave it in short 10-second bursts to ensure the chocolate is fully melted.
Step 2: Add Flavor and Chill
Once the chocolate is melted and smooth, stir in the orange zest, orange extract, vanilla extract, and salt. These ingredients will give your truffles that signature citrusy flavor.
Cover the bowl with plastic wrap and refrigerate for about 2 hours, or until the mixture is firm enough to scoop.
Step 3: Roll the Truffles
Once the mixture has chilled and hardened, use a small cookie scoop or a spoon to scoop out portions of the truffle mixture. Roll each portion between your hands to form smooth, bite-sized balls. If the mixture is too soft, pop it back in the fridge for a bit longer.
Step 4: Coat the Truffles
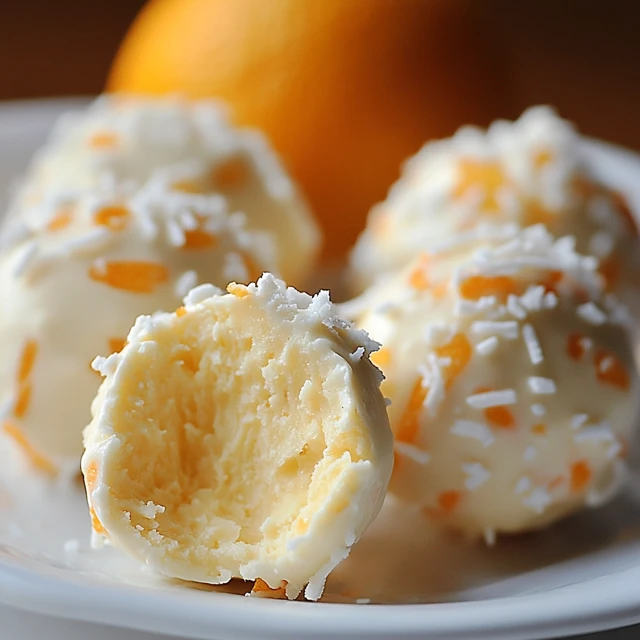
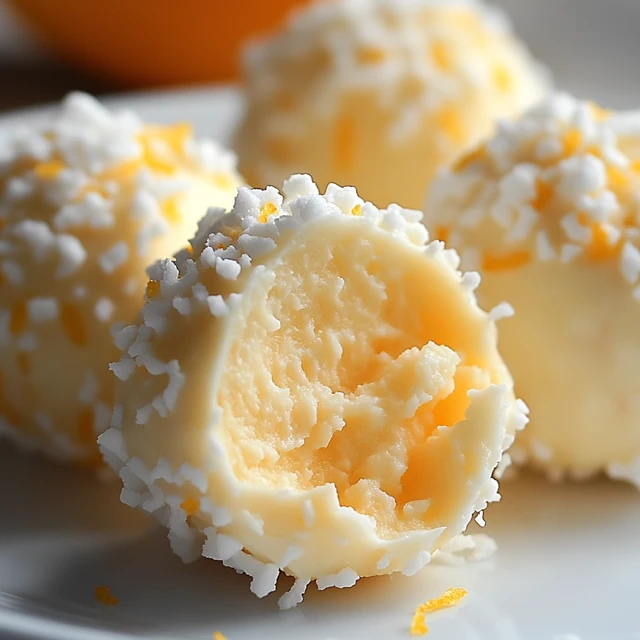
Roll each truffle in powdered sugar until fully coated. This gives them a sweet, slightly textured finish. If you prefer, you can also roll them in shredded coconut or finely crushed graham crackers for a fun twist!
Step 5: Enjoy!
Once all the truffles are rolled and coated, they’re ready to enjoy! Keep them stored in an airtight container in the fridge until you’re ready to serve.
Helpful Tips
- Use high-quality white chocolate – Since white chocolate is a major flavor component, using a good brand will make a difference.
- Chill thoroughly – The mixture needs to be firm enough to roll. If it’s too soft, let it chill for another 30 minutes.
- Try different coatings – Powdered sugar is classic, but shredded coconut, crushed cookies, or even a drizzle of melted chocolate can add extra flavor and texture.
- Work quickly – The warmth of your hands can soften the truffle mixture, so if needed, work in batches and keep the rest chilled.
Recipe Details
- Prep Time: 10 minutes
- Chill Time: 2 hours
- Total Time: 2 hours 10 minutes
- Yield: About 20 truffles
- Category: Dessert
- Method: No-Bake
- Cuisine: American
- Diet: Vegetarian

Notes
- Zest Matters – The orange zest is what gives these truffles their fresh, citrusy punch. Be sure to zest only the outer layer of the peel, avoiding the bitter white pith underneath.
- Stronger Orange Flavor? – If you love a bold orange taste, you can increase the orange extract slightly, but don’t overdo it—a little goes a long way!
- Smoother Rolling – If the truffle mixture sticks to your hands while rolling, lightly dust your palms with powdered sugar or chill the mixture longer.
- Chocolate Variation – You can drizzle the finished truffles with melted white or dark chocolate for an extra decorative touch.
- Make Ahead – These truffles are perfect for making ahead of time since they keep well in the fridge or freezer. Ideal for parties or holiday treats!
Storage Instructions
- Refrigerator: Store truffles in an airtight container in the fridge for up to 1 week.
- Freezer: These truffles freeze well! Store them in a freezer-safe container for up to 3 months. Thaw in the fridge before serving.
Frequently Asked Questions
Can I use fresh orange juice instead of orange extract?
While fresh orange juice adds natural flavor, it may make the mixture too runny. Orange extract is more concentrated and helps maintain the right texture.
What if my truffle mixture is too soft to roll?
Let it chill longer! If you’re in a hurry, pop it in the freezer for about 15 minutes to speed up the process.
Can I make these dairy-free?
Yes! Use dairy-free white chocolate and swap the heavy cream for canned coconut cream for a delicious alternative.
Do I have to roll them in powdered sugar?
Nope! Feel free to experiment with shredded coconut, crushed cookies, or even a dusting of cocoa powder for a unique twist.
Related Recipes
If you loved these No-Bake Orange Creamsicle Truffles, here are some other sweet treats you might enjoy:
Conclusion
These No-Bake Orange Creamsicle Truffles are the perfect little bites of sunshine! With their creamy white chocolate center and zesty orange flavor, they’re a fun, easy, and delightful treat for any occasion. Plus, since they’re no-bake, they’re a great recipe to make with kids or when you need a quick dessert without turning on the oven.
Print
No-Bake Orange Creamsicle Truffles
Description
There’s something undeniably nostalgic about the classic orange creamsicle flavor—sweet, citrusy, and creamy all at once. It instantly takes you back to warm summer afternoons, chasing the ice cream truck down the street, or enjoying a refreshing frozen treat on the porch. Now, imagine capturing that same delightful flavor in a bite-sized, melt-in-your-mouth truffle.
These No-Bake Orange Creamsicle Truffles are a dreamy combination of bright orange zest, smooth white chocolate, and a luscious creamy center. They require no baking, making them the perfect treat for when you’re short on time but still want to impress. Whether you’re making them for a party, gifting them to a friend, or just treating yourself, these little bites of sunshine will be a hit!
Ingredients
- 2 ½ cups white chocolate chips
- ½ cup heavy cream
- 1 tablespoon unsalted butter
- Zest of 1 orange
- ½ teaspoon orange extract
- ½ teaspoon vanilla extract
- ¼ teaspoon salt
- 1 cup powdered sugar (for rolling)
Instructions
In a heatproof bowl, add the white chocolate chips. In a small saucepan, heat the heavy cream and butter over medium heat until it just starts to simmer. You don’t want it boiling—just warm enough to melt the chocolate.
Pour the warm cream mixture over the white chocolate and let it sit for about a minute. Then, stir until smooth and creamy. If needed, you can microwave it in short 10-second bursts to ensure the chocolate is fully melted.
Once the chocolate is melted and smooth, stir in the orange zest, orange extract, vanilla extract, and salt. These ingredients will give your truffles that signature citrusy flavor.
Cover the bowl with plastic wrap and refrigerate for about 2 hours, or until the mixture is firm enough to scoop.
Once the mixture has chilled and hardened, use a small cookie scoop or a spoon to scoop out portions of the truffle mixture. Roll each portion between your hands to form smooth, bite-sized balls. If the mixture is too soft, pop it back in the fridge for a bit longer.
Roll each truffle in powdered sugar until fully coated. This gives them a sweet, slightly textured finish. If you prefer, you can also roll them in shredded coconut or finely crushed graham crackers for a fun twist!
Once all the truffles are rolled and coated, they’re ready to enjoy! Keep them stored in an airtight container in the fridge until you’re ready to serve.
Notes
- Zest Matters – The orange zest is what gives these truffles their fresh, citrusy punch. Be sure to zest only the outer layer of the peel, avoiding the bitter white pith underneath.
- Stronger Orange Flavor? – If you love a bold orange taste, you can increase the orange extract slightly, but don’t overdo it—a little goes a long way!
- Smoother Rolling – If the truffle mixture sticks to your hands while rolling, lightly dust your palms with powdered sugar or chill the mixture longer.
- Chocolate Variation – You can drizzle the finished truffles with melted white or dark chocolate for an extra decorative touch.
- Make Ahead – These truffles are perfect for making ahead of time since they keep well in the fridge or freezer. Ideal for parties or holiday treats!