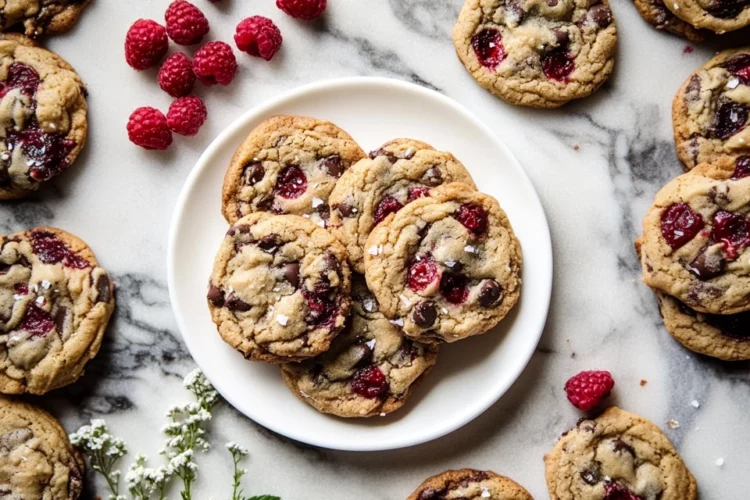
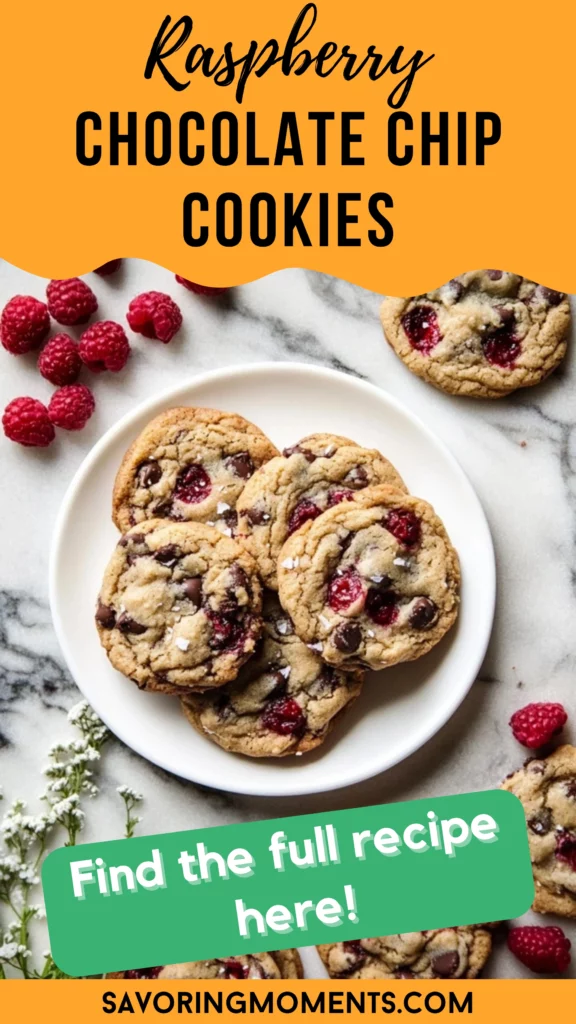
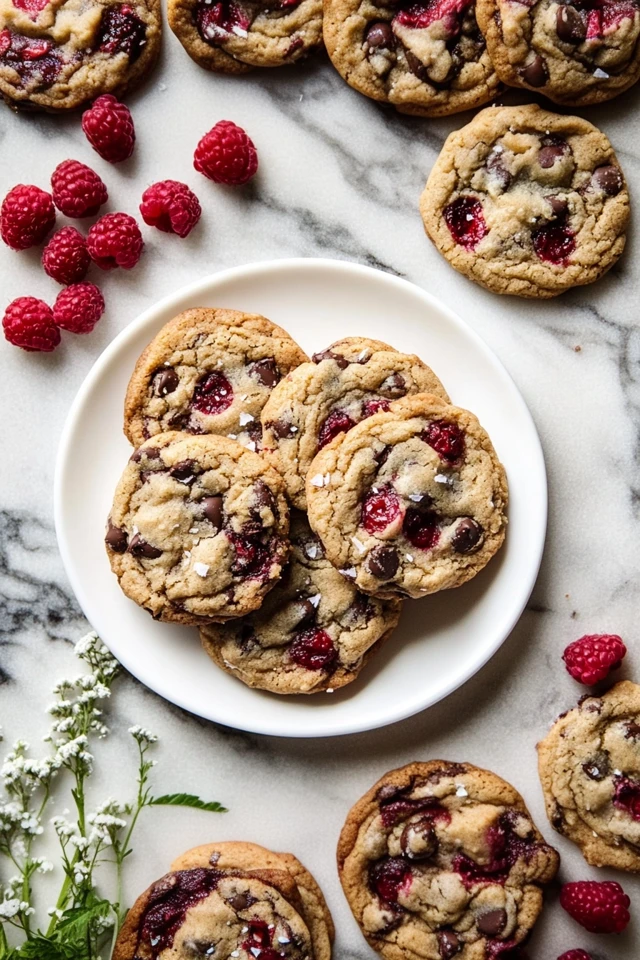
There’s something magical about the combination of tart berries and rich chocolate—especially when they’re baked into soft, gooey cookies that feel like a warm hug. These Raspberry Chocolate Chip Cookies are more than just a sweet treat—they’re little reminders of summer’s warmth, no matter the season.
The first time I made these, it was mid-winter. The snow was falling outside, and I was craving something cozy, but also a little bright and unexpected. That’s when the idea of folding raspberries into a classic chocolate chip cookie popped into my mind. The result? A cookie that’s both comfort food and a little celebration in every bite.

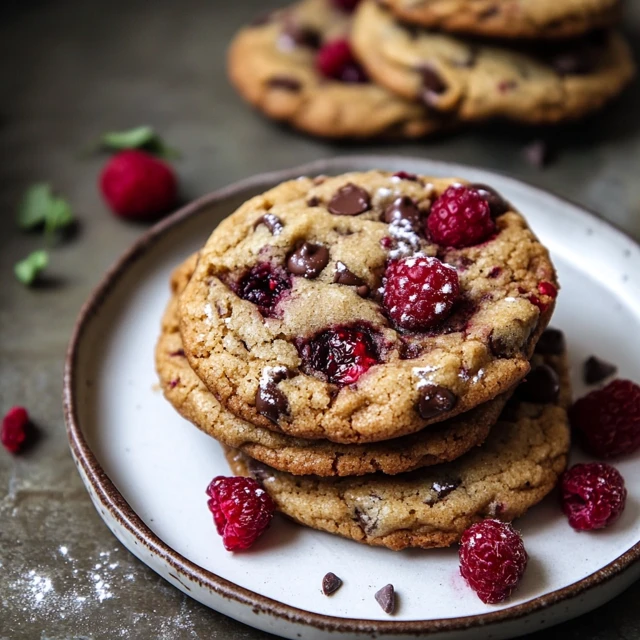
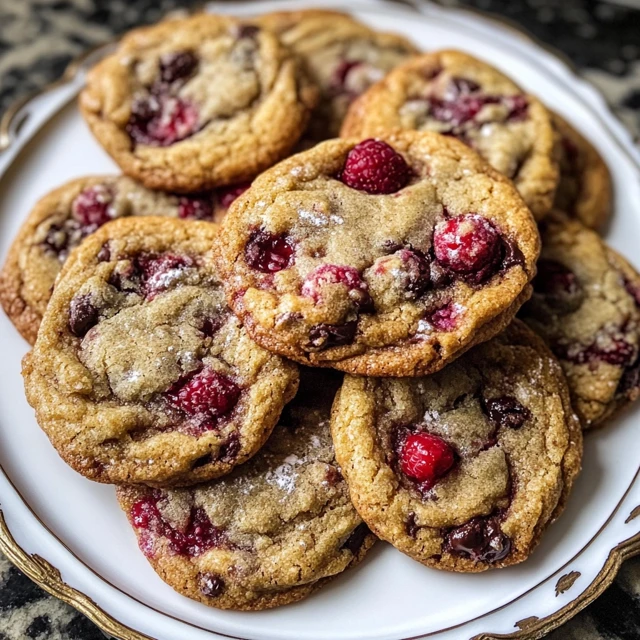
What makes this recipe extra special is how the juicy raspberries melt into the dough, creating pockets of tartness that perfectly balance the melty chocolate. They taste like a bakery-style treat you’d buy for a fancy brunch but are surprisingly simple to whip up at home.
Whether you’re baking these for a spring gathering, a cozy weekend indoors, or just because your sweet tooth is calling, these cookies are bound to become a new favorite.
Why You’ll Love This Recipe:
- The flavor combo is out-of-this-world: tart raspberries and sweet, melty chocolate
- Bakery-style cookies you can make right in your own kitchen
- The edges are perfectly crisp, while the centers stay soft and chewy
- It’s a fun twist on the classic chocolate chip cookie
- Great for gifting, gatherings, or snacking straight off the baking sheet
INGREDIENTS YOU’LL NEED:
- 1 cup (2 sticks) unsalted butter, at room temperature
- 1 1/4 cups packed dark brown sugar
- 1/4 cup granulated sugar
- 2 large eggs, at room temperature
- 1 tablespoon vanilla extract
- 2 1/2 cups all-purpose flour
- 1/2 teaspoon baking soda
- 1/2 teaspoon baking powder
- 1/2 teaspoon kosher salt
- 2 cups semi-sweet chocolate chips or chunks
- 1 1/2 cups frozen raspberries (do not thaw)
HOW TO MAKE RASPBERRY CHOCOLATE CHIP COOKIES:
STEP-BY-STEP INSTRUCTIONS:
Step 1: Cream the butter and sugars
In a large mixing bowl, beat the room-temperature butter with the brown sugar and granulated sugar until the mixture is creamy and fluffy. This step sets the tone for a perfectly textured cookie—don’t rush it! I like to use a hand mixer or stand mixer, but good old-fashioned elbow grease works too.
Step 2: Add the eggs and vanilla
Mix in the eggs, one at a time, followed by the vanilla extract. This helps bind everything together and adds that classic cookie flavor that brings all the cozy vibes.
Step 3: Mix the dry ingredients
In a separate bowl, whisk together the flour, baking soda, baking powder, and salt. Slowly add the dry mixture into the wet ingredients, mixing just until combined. Don’t overmix—this helps keep your cookies tender.
Step 4: Stir in the chocolate
Now the best part—add those generous chunks or chips of chocolate. Stir until evenly distributed. You want chocolate in every bite!
Step 5: Gently fold in the raspberries
Using a spatula, gently fold the frozen raspberries into the dough. Be gentle—they’ll break up a little, and that’s okay! It creates beautiful streaks of raspberry throughout the dough, almost like a watercolor painting.
Step 6: Scoop and chill (optional but recommended)
Scoop the dough into balls (about 2 tablespoons each) and place them on a parchment-lined baking sheet. If you have time, chill the dough for 20–30 minutes. This helps prevent spreading and deepens the flavor.
Step 7: Bake
Preheat your oven to 375°F (190°C). Bake the cookies for 8–10 minutes, or until the edges are golden and the centers are just set. Don’t overbake—you want the centers to stay soft and chewy!
Step 8: Cool and enjoy
Let the cookies cool on the baking sheet for 5–10 minutes before transferring to a wire rack. Enjoy them warm, when the chocolate is still melty and the berries are gooey.
HELPFUL TIPS:
- Use frozen raspberries: Fresh berries will release too much moisture and can make the dough soggy. Frozen raspberries hold their shape better while still creating that gorgeous marbled effect.
- Don’t overmix once raspberries are added: A few streaks of raspberry and pink dough are what you want. Overmixing can make the dough too wet.
- Chill the dough for thicker cookies: If you prefer cookies with a little more height and a chewy center, chilling the dough for at least 20 minutes makes a big difference.
- Line your baking sheet with parchment paper: This makes clean-up easier and helps the cookies bake more evenly.
DETAILS:
- Prep Time: 20 minutes
- Cook Time: 10 minutes
- Total Time: 30–40 minutes
- Yield: About 20–24 cookies
- Category: Dessert
- Method: Baking
- Cuisine: American
- Diet: Vegetarian
NOTES:
These cookies are best enjoyed the day they’re made, but they stay soft for days! If you’re baking them for an event, they travel well and make for an eye-catching addition to any dessert table.
NUTRITIONAL INFORMATION:
(Per cookie, approximately)
- Calories: 220
- Carbohydrates: 28g
- Protein: 2g
- Fat: 11g
- Saturated Fat: 7g
- Cholesterol: 35mg
- Sodium: 85mg
- Sugar: 17g
- Fiber: 1g
FREQUENTLY ASKED QUESTIONS:
Can I use fresh raspberries instead of frozen?
It’s best to stick with frozen raspberries. Fresh ones tend to release too much juice, which can make the cookies overly wet and affect the texture.
Can I freeze the dough?
Yes! You can scoop and freeze the dough balls for up to 3 months. Just bake straight from frozen—add 1–2 minutes to the bake time.
Do I need to chill the dough?
Chilling is optional, but it helps prevent spreading and gives you a thicker, chewier cookie. If you’re short on time, feel free to skip it—they’ll still be delicious.
STORAGE INSTRUCTIONS:
Store cookies in an airtight container at room temperature for up to 4–5 days. To keep them extra soft, place a slice of bread in the container with the cookies—it works like magic.
You can also freeze baked cookies in a zip-top bag for up to 2 months. Reheat in the microwave for 10–15 seconds for that just-baked taste.
Related Recipes
If you liked this recipe, you’ll definitely enjoy these other fruity, chocolatey delights:
- Strawberry Shortcake Cookies
- Caramel Apple Cider Cookies
- Raspberry-Filled Almond Snow Cookies
- Soft and Sweet Linzer Cookies
CONCLUSION
Raspberry Chocolate Chip Cookies are the kind of treat that feels both nostalgic and new. They’re a twist on a timeless classic, with juicy raspberries adding a pop of flavor and color that makes each bite exciting. Whether you’re baking for a weekend treat, a special occasion, or just because you deserve something sweet, these cookies won’t disappoint.
Print
Raspberry Chocolate Chip Cookies
Description
There’s something magical about the combination of tart berries and rich chocolate—especially when they’re baked into soft, gooey cookies that feel like a warm hug. These Raspberry Chocolate Chip Cookies are more than just a sweet treat—they’re little reminders of summer’s warmth, no matter the season.
The first time I made these, it was mid-winter. The snow was falling outside, and I was craving something cozy, but also a little bright and unexpected. That’s when the idea of folding raspberries into a classic chocolate chip cookie popped into my mind. The result? A cookie that’s both comfort food and a little celebration in every bite.
What makes this recipe extra special is how the juicy raspberries melt into the dough, creating pockets of tartness that perfectly balance the melty chocolate. They taste like a bakery-style treat you’d buy for a fancy brunch but are surprisingly simple to whip up at home.
Whether you’re baking these for a spring gathering, a cozy weekend indoors, or just because your sweet tooth is calling, these cookies are bound to become a new favorite.
Ingredients
- 1 cup (2 sticks) unsalted butter, at room temperature
- 1 1/4 cups packed dark brown sugar
- 1/4 cup granulated sugar
- 2 large eggs, at room temperature
- 1 tablespoon vanilla extract
- 2 1/2 cups all-purpose flour
- 1/2 teaspoon baking soda
- 1/2 teaspoon baking powder
- 1/2 teaspoon kosher salt
- 2 cups semi-sweet chocolate chips or chunks
- 1 1/2 cups frozen raspberries (do not thaw)
Instructions
Step 1: Cream the butter and sugars
In a large mixing bowl, beat the room-temperature butter with the brown sugar and granulated sugar until the mixture is creamy and fluffy. This step sets the tone for a perfectly textured cookie—don’t rush it! I like to use a hand mixer or stand mixer, but good old-fashioned elbow grease works too.
Step 2: Add the eggs and vanilla
Mix in the eggs, one at a time, followed by the vanilla extract. This helps bind everything together and adds that classic cookie flavor that brings all the cozy vibes.
Step 3: Mix the dry ingredients
In a separate bowl, whisk together the flour, baking soda, baking powder, and salt. Slowly add the dry mixture into the wet ingredients, mixing just until combined. Don’t overmix—this helps keep your cookies tender.
Step 4: Stir in the chocolate
Now the best part—add those generous chunks or chips of chocolate. Stir until evenly distributed. You want chocolate in every bite!
Step 5: Gently fold in the raspberries
Using a spatula, gently fold the frozen raspberries into the dough. Be gentle—they’ll break up a little, and that’s okay! It creates beautiful streaks of raspberry throughout the dough, almost like a watercolor painting.
Step 6: Scoop and chill (optional but recommended)
Scoop the dough into balls (about 2 tablespoons each) and place them on a parchment-lined baking sheet. If you have time, chill the dough for 20–30 minutes. This helps prevent spreading and deepens the flavor.
Step 7: Bake
Preheat your oven to 375°F (190°C). Bake the cookies for 8–10 minutes, or until the edges are golden and the centers are just set. Don’t overbake—you want the centers to stay soft and chewy!
Step 8: Cool and enjoy
Let the cookies cool on the baking sheet for 5–10 minutes before transferring to a wire rack. Enjoy them warm, when the chocolate is still melty and the berries are gooey.
Notes
These cookies are best enjoyed the day they’re made, but they stay soft for days! If you’re baking them for an event, they travel well and make for an eye-catching addition to any dessert table.