There’s something extraordinary that happens when cultures collide in the kitchen—especially when those cultures happen to be Italian and American. Imagine the deep, fudgy embrace of a classic brownie paired with the creamy sophistication of a traditional tiramisu. That’s the heart and soul of tiramisu brownies.

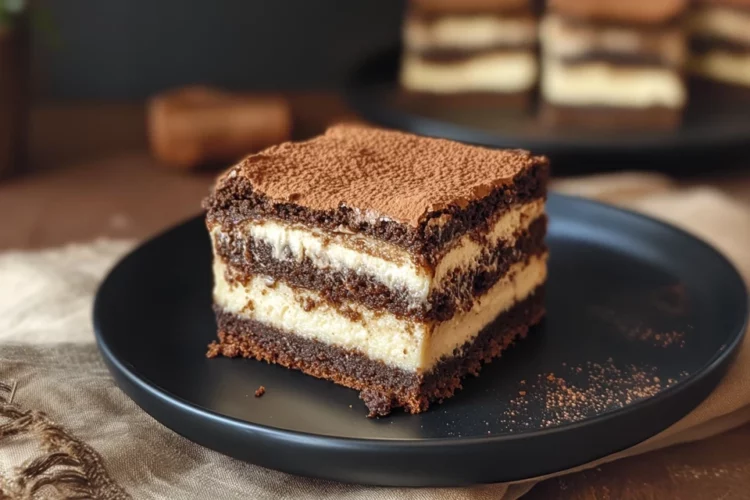
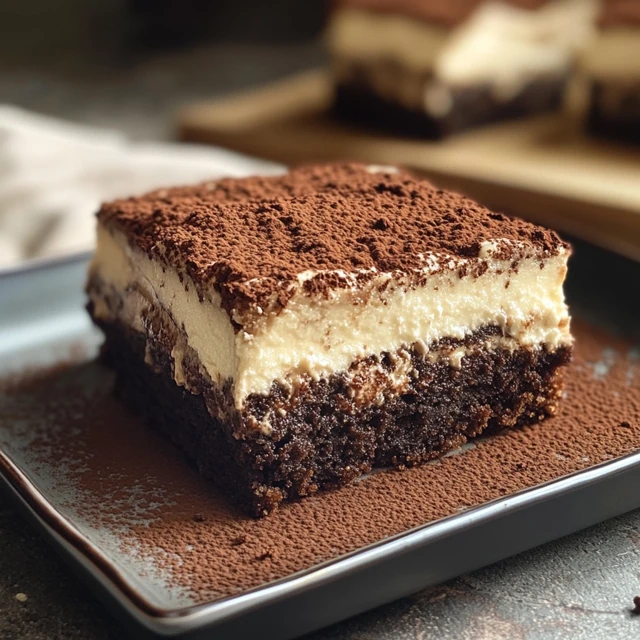
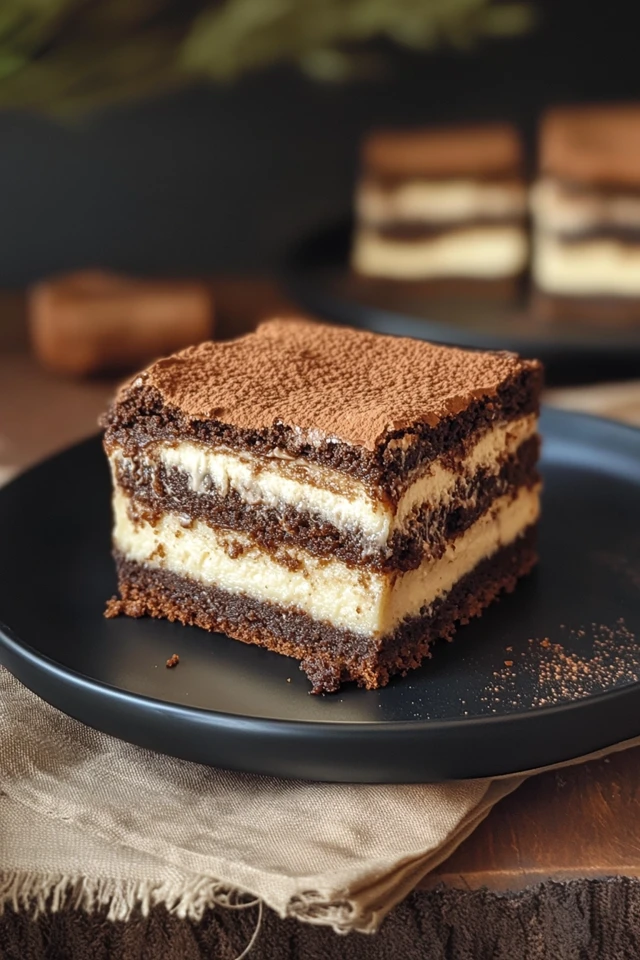
I first discovered tiramisu brownies at a family gathering around the holidays. My cousin, a passionate home baker who spent a summer in Florence, wanted to merge her two dessert loves: dense American brownies and the smooth, coffee-laced mascarpone layers of Italy’s iconic tiramisu. When she pulled the pan from the fridge, revealing neat layers dusted with cocoa and soaked with espresso, I knew we were about to experience something special.
Since then, this has become a go-to dessert in our family for celebrations, potlucks, or those colder months when a slice of comfort is all you crave. Each bite tells a story—rich with cocoa, warm with coffee, and so luxuriously creamy you close your eyes just to taste it fully. The way the layers meld together after a night in the fridge, the way the mascarpone gently cradles the spongey ladyfingers—it’s a dessert that lingers in memory long after the last bite.
Let’s walk through the magic of creating tiramisu brownies in your own kitchen.
Why You’ll Love This Recipe:
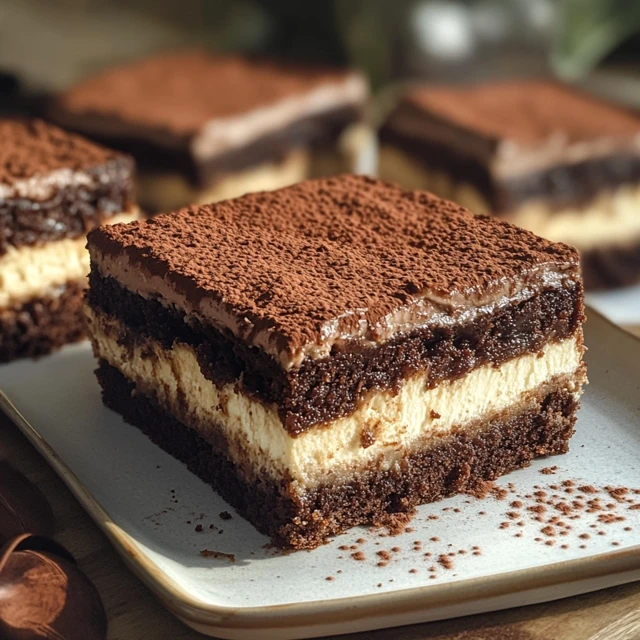
- Comfort Meets Elegance: Rich, fudgy brownies meet creamy mascarpone and espresso-soaked ladyfingers in this indulgent dessert.
- Make-Ahead Friendly: Prepare it a day ahead and let the flavors deepen overnight—ideal for holidays and dinner parties.
- Perfect for Celebrations: A beautiful, layered dessert that looks fancy but is incredibly approachable to make.
- Balanced Sweetness: The bitter espresso and unsweetened cocoa beautifully balance the sweetness of the brownie base and mascarpone topping.
- Crowd-Pleasing Texture: From chewy brownie to soft ladyfingers and fluffy cream, every bite is texturally delightful.
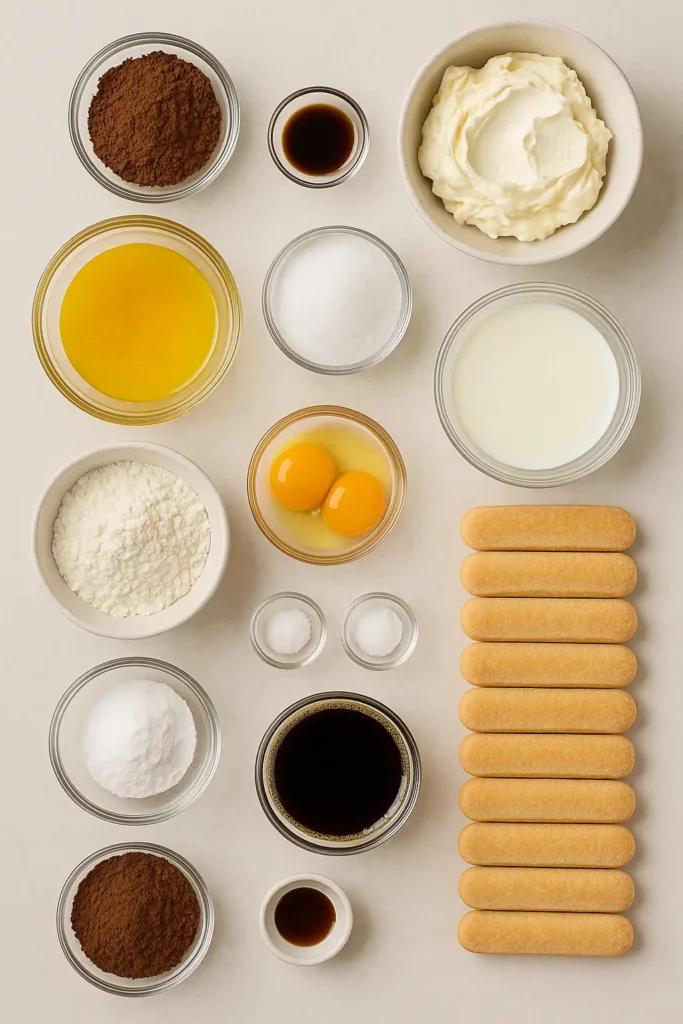
INGREDIENTS YOU’LL NEED:
For the Brownie Layer:
- 1/2 cup unsalted butter, melted
- 1 cup granulated sugar
- 2 large eggs
- 1 teaspoon vanilla extract
- 1/3 cup unsweetened cocoa powder
- 1/2 cup all-purpose flour
- 1/4 teaspoon baking powder
- 1/4 teaspoon salt
For the Tiramisu Cream Layer:
- 1 cup mascarpone cheese, softened
- 1/2 cup heavy whipping cream
- 1/4 cup powdered sugar
- 1 teaspoon vanilla extract
For Assembly:
- 1/2 cup strong brewed espresso or coffee, cooled
- 12–14 ladyfinger cookies (savoiardi)
- Unsweetened cocoa powder, for dusting
How to Make Tiramisu Brownies
This recipe is a gentle layering of effort and love. Give yourself time and grace—it’s worth it.
STEP-BY-STEP INSTRUCTIONS:
Step 1: Prepare the Brownie Base
Start by preheating your oven to 350°F (175°C) and greasing an 8-inch square baking pan. I like to line the bottom with parchment paper for easier removal.
In a saucepan or microwave-safe bowl, melt the butter. Stir in the granulated sugar, then beat in the eggs one at a time. Add vanilla extract and mix until glossy.
Sift in the cocoa powder, flour, salt, and baking powder. Stir until just combined—don’t overmix or you’ll lose that soft, chewy brownie texture.
Pour the brownie batter into the prepared pan and spread it evenly. Bake for 20–25 minutes. The center should still be slightly soft, and a toothpick should come out with a few moist crumbs.
Let the brownies cool completely on a wire rack. This part is crucial—warm brownies will melt the mascarpone cream.
Step 2: Make the Mascarpone Layer
In a bowl, whip the mascarpone cheese until smooth and creamy. In a separate bowl, beat the heavy cream, powdered sugar, and vanilla extract until stiff peaks form.
Fold the whipped cream into the mascarpone gently until fully incorporated. The mixture should be light and airy, but rich.
Step 3: Assemble the Layers
Brush the cooled brownie surface generously with the cooled espresso. You want that deep, roasted coffee flavor to seep into every bite.
Lay the ladyfingers snugly across the surface. Break them in half or trim them if needed to create a flat layer. Brush them again with more espresso until just saturated.
Spread the mascarpone mixture evenly over the ladyfingers. Use a spatula to smooth it into a thick, even layer.
Dust the top with unsweetened cocoa powder using a fine mesh sieve.
Cover and refrigerate for at least 4 hours, preferably overnight. This lets all the layers harmonize beautifully.
HELPFUL TIPS:
- Chill overnight: The flavors intensify and the layers hold better after a long rest in the fridge.
- Cutting clean slices: Dip your knife in hot water and wipe clean between slices.
- Make it your own: Add a light grating of dark chocolate on top or a few chocolate curls for garnish.
DETAILS:
- Prep Time: 30 minutes
- Cook Time: 25 minutes
- Total Time: 55 minutes (plus chilling time)
- Yield: 9 large bars or 12 smaller servings
- Category: Dessert
- Method: Baking
- Cuisine: Italian-American Fusion
- Diet: Vegetarian
NOTES:
- Brownie base can be made a day ahead and refrigerated before assembling.
- For a stronger coffee flavor, use espresso rather than brewed coffee.
- Use high-quality mascarpone and cocoa powder for the best flavor.

NUTRITIONAL INFORMATION (Per Serving):
- Calories: 350
- Total Fat: 22g
- Saturated Fat: 13g
- Cholesterol: 95mg
- Sodium: 120mg
- Carbohydrates: 35g
- Sugars: 20g
- Protein: 5g
FREQUENTLY ASKED QUESTIONS:
Can I use cream cheese instead of mascarpone?
Yes, though the flavor and texture will be slightly different. For a closer substitute, mix cream cheese with a bit of sour cream.
Can I use decaf coffee for the espresso?
Absolutely. Decaf still brings the bold coffee flavor without the caffeine kick.
Can tiramisu brownies be frozen?
It’s not recommended as freezing may alter the mascarpone cream texture.
STORAGE INSTRUCTIONS:
- Store tiramisu brownies covered in the refrigerator for up to 3 days.
- Do not freeze, as the mascarpone layer can become watery when thawed.
Related Recipes:
If you liked this recipe, you’ll definitely enjoy these other cheesy delights:
- Tiramisu Cheesecake – A Heavenly Fusion of Two Classics
- Hot Fudge Sundae Brownie Cheesecake
- Brownie Tiramisu
- Coffee Whipped Cream
CONCLUSION:
Tiramisu brownies are more than just a dessert—they’re a celebration of two cultures, layered into one indulgent bite. Whether you’re serving them at a special gathering or sneaking a piece after a long day, this recipe delivers the perfect balance of cozy, creamy, and decadent. The next time you’re torn between brownies or tiramisu, remember—you don’t have to choose. You can have both.
Print
Tiramisu Brownies
Description
There’s something extraordinary that happens when cultures collide in the kitchen—especially when those cultures happen to be Italian and American. Imagine the deep, fudgy embrace of a classic brownie paired with the creamy sophistication of a traditional tiramisu. That’s the heart and soul of tiramisu brownies.
I first discovered tiramisu brownies at a family gathering around the holidays. My cousin, a passionate home baker who spent a summer in Florence, wanted to merge her two dessert loves: dense American brownies and the smooth, coffee-laced mascarpone layers of Italy’s iconic tiramisu. When she pulled the pan from the fridge, revealing neat layers dusted with cocoa and soaked with espresso, I knew we were about to experience something special.
Since then, this has become a go-to dessert in our family for celebrations, potlucks, or those colder months when a slice of comfort is all you crave. Each bite tells a story—rich with cocoa, warm with coffee, and so luxuriously creamy you close your eyes just to taste it fully. The way the layers meld together after a night in the fridge, the way the mascarpone gently cradles the spongey ladyfingers—it’s a dessert that lingers in memory long after the last bite.
Let’s walk through the magic of creating tiramisu brownies in your own kitchen.
Ingredients
For the Brownie Layer:
1/2 cup unsalted butter, melted
1 cup granulated sugar
2 large eggs
1 teaspoon vanilla extract
1/3 cup unsweetened cocoa powder
1/2 cup all-purpose flour
1/4 teaspoon baking powder
1/4 teaspoon salt
For the Tiramisu Cream Layer:
1 cup mascarpone cheese, softened
1/2 cup heavy whipping cream
1/4 cup powdered sugar
1 teaspoon vanilla extract
For Assembly:
1/2 cup strong brewed espresso or coffee, cooled
12–14 ladyfinger cookies (savoiardi)
Unsweetened cocoa powder, for dusting
Instructions
Start by preheating your oven to 350°F (175°C) and greasing an 8-inch square baking pan. I like to line the bottom with parchment paper for easier removal.
In a saucepan or microwave-safe bowl, melt the butter. Stir in the granulated sugar, then beat in the eggs one at a time. Add vanilla extract and mix until glossy.
Sift in the cocoa powder, flour, salt, and baking powder. Stir until just combined—don’t overmix or you’ll lose that soft, chewy brownie texture.
Pour the brownie batter into the prepared pan and spread it evenly. Bake for 20–25 minutes. The center should still be slightly soft, and a toothpick should come out with a few moist crumbs.
Let the brownies cool completely on a wire rack. This part is crucial—warm brownies will melt the mascarpone cream.
In a bowl, whip the mascarpone cheese until smooth and creamy. In a separate bowl, beat the heavy cream, powdered sugar, and vanilla extract until stiff peaks form.
Fold the whipped cream into the mascarpone gently until fully incorporated. The mixture should be light and airy, but rich.
Brush the cooled brownie surface generously with the cooled espresso. You want that deep, roasted coffee flavor to seep into every bite.
Lay the ladyfingers snugly across the surface. Break them in half or trim them if needed to create a flat layer. Brush them again with more espresso until just saturated.
Spread the mascarpone mixture evenly over the ladyfingers. Use a spatula to smooth it into a thick, even layer.
Dust the top with unsweetened cocoa powder using a fine mesh sieve.
Cover and refrigerate for at least 4 hours, preferably overnight. This lets all the layers harmonize beautifully.
Notes
-
Brownie base can be made a day ahead and refrigerated before assembling.
-
For a stronger coffee flavor, use espresso rather than brewed coffee.
-
Use high-quality mascarpone and cocoa powder for the best flavor.