The first time I made Apple Crisp Mini Cheesecakes was on a breezy October weekend, just as the scent of woodsmoke started to linger in the air. I was visiting my grandmother in her small countryside cottage, where apple trees lined the gravel path like old friends bowing in the wind. That day, we picked fresh apples together and talked about how apple desserts always feel like a warm hug from home.

This dessert is a celebration of comfort food traditions, but with a playful twist. Apple crisp has long been a staple of fall baking—served warm with a scoop of ice cream at family dinners or tucked into lunchboxes during harvest festivals. Now imagine marrying that nostalgic flavor with the velvety richness of cheesecake, in a handheld form that’s perfect for parties, potlucks, or just quiet moments with a cup of tea.
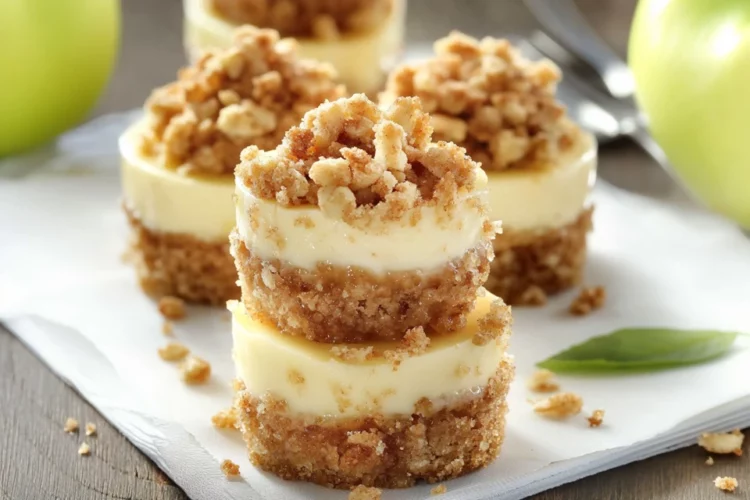
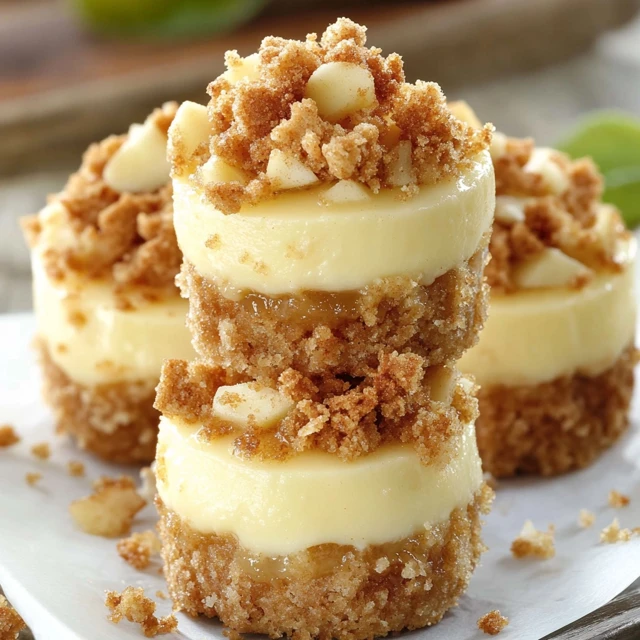
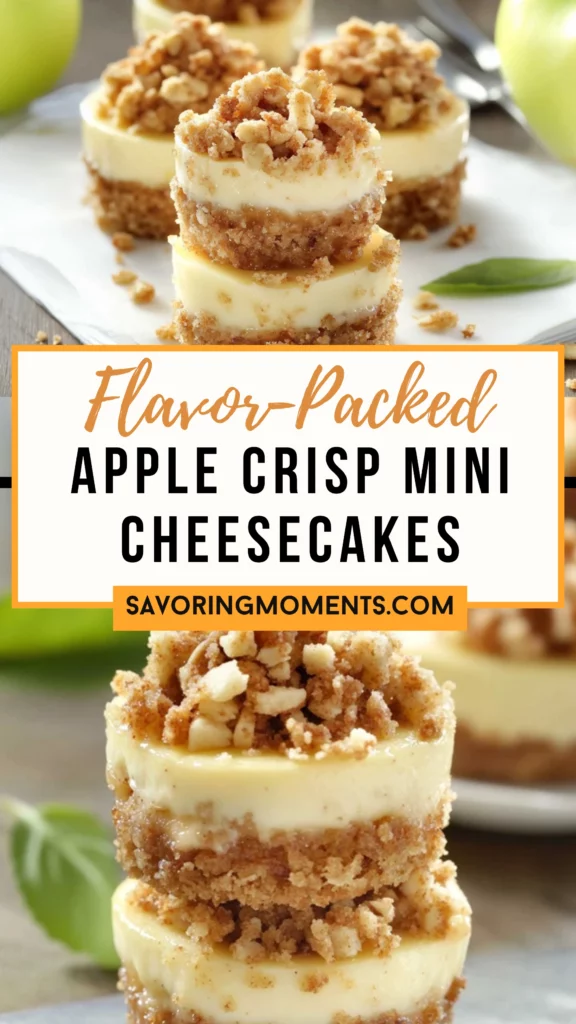
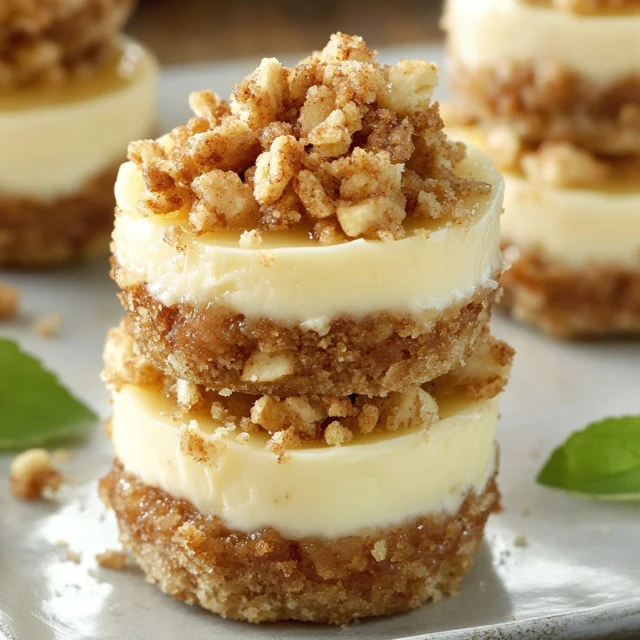
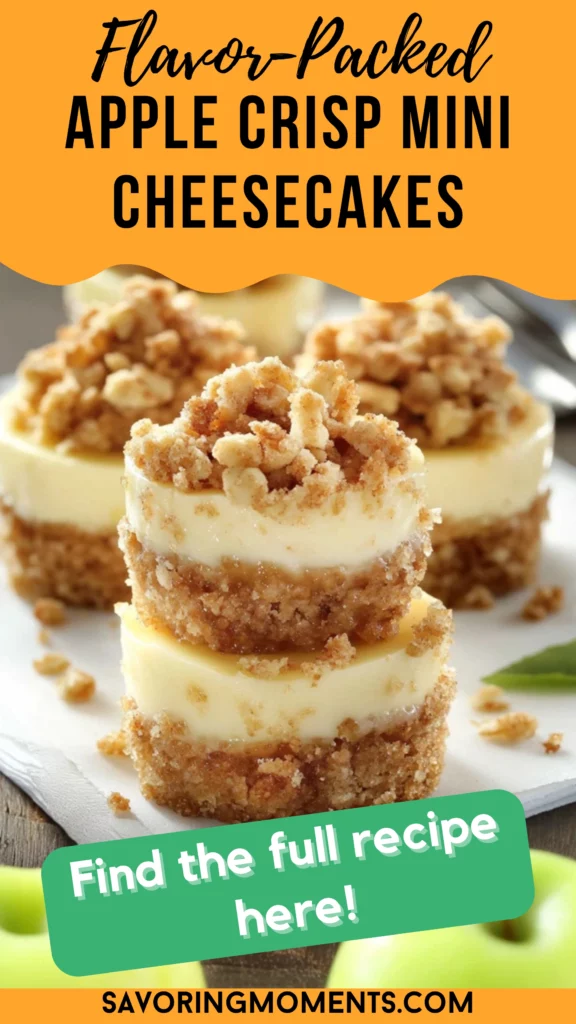
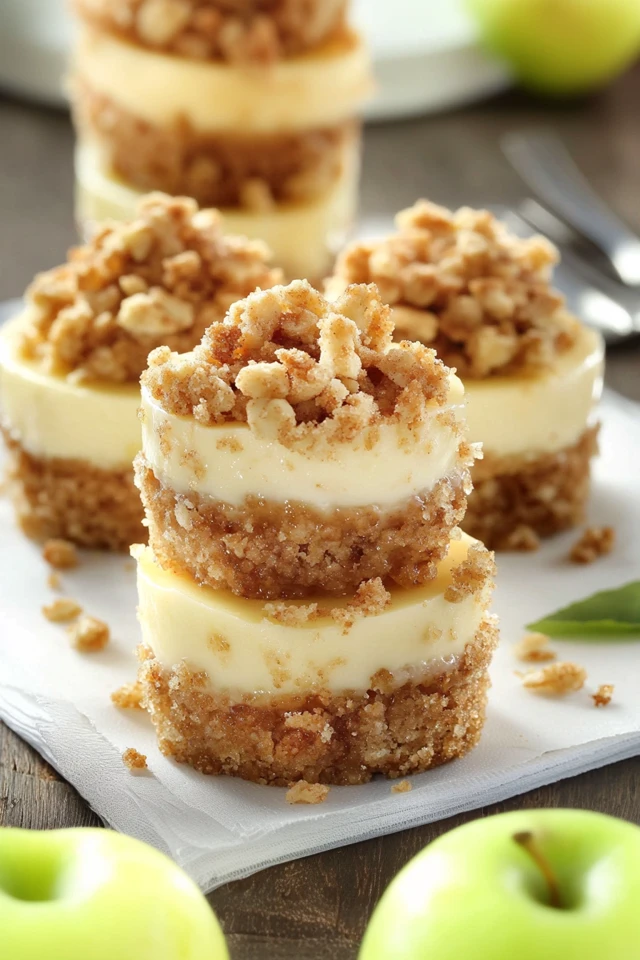
Apple Crisp Mini Cheesecakes combine everything we love about fall—spiced apples, buttery oats, creamy layers—into one delicious bite. With a crumbly oat crust and streusel topping surrounding a smooth cheesecake center, these minis are more than a dessert; they’re a celebration of the season.
Why You’ll Love This Recipe
- Perfect for Autumn Gatherings: These mini cheesecakes are ideal for Thanksgiving dessert tables, fall birthdays, or any cozy weekend treat.
- Individual Portions: No slicing needed. Each one is its own perfectly layered dessert.
- Crowd-Pleaser: Kids and adults alike adore the blend of spiced fruit and creamy filling.
- Make-Ahead Friendly: You can prep them a day before your event and chill overnight.
INGREDIENTS YOU’LL NEED:
For the Crust:
- 1 cup graham cracker crumbs
- 3/4 cup rolled oats
- 1/4 cup brown sugar
- 1/2 cup melted butter
For the Cheesecake Filling:
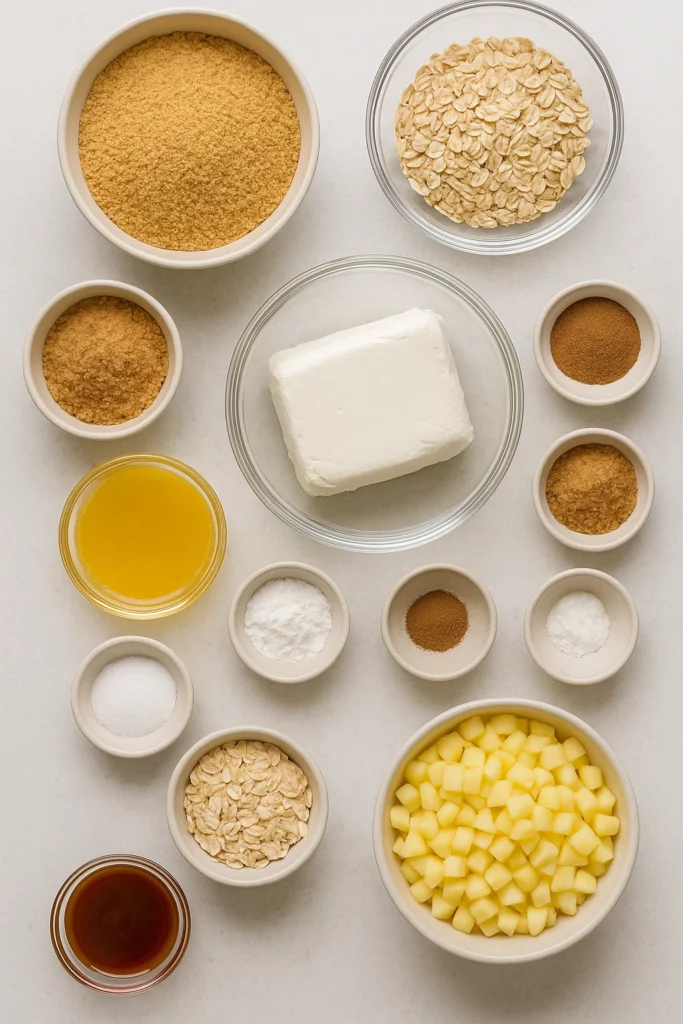
- 16 oz cream cheese, softened
- 1/4 cup granulated sugar
- 1/4 cup brown sugar
- 2 tbsp cornstarch
- 2 tsp vanilla extract
- 1/2 tsp ground cinnamon
- 1/8 tsp ground ginger
For the Apple Crisp Topping:
- 2 medium apples, peeled, cored, and finely chopped
- 1/4 cup all-purpose flour
- 1/4 cup rolled oats
- 1/4 cup brown sugar
- 1/2 tsp ground cinnamon
- 2 tbsp coconut oil (or melted butter)
Optional:
- Caramel sauce for drizzling
How to Make Apple Crisp Mini Cheesecakes
Creating these Apple Crisp Mini Cheesecakes feels like building little edible stories in each muffin cup—every layer adding a chapter of texture and flavor.
STEP-BY-STEP INSTRUCTIONS:
Step 1: Prep Your Oven and Pan
Preheat your oven to 350°F (175°C). Line a muffin tin with 12–18 paper liners depending on size. Lightly spray with nonstick cooking spray if desired.
Step 2: Make the Crust
In a bowl, mix graham cracker crumbs, oats, brown sugar, and melted butter until it resembles damp sand. Scoop about 1 tablespoon into each liner and press down firmly. Bake for 5 minutes, then let them cool.
Step 3: Whip Up the Cheesecake Filling
In a large mixing bowl, beat cream cheese until smooth and fluffy. Add both sugars, cornstarch, vanilla, cinnamon, and ginger. Blend until creamy and smooth.
Step 4: Spoon in the Cheesecake Layer
Distribute the cheesecake batter evenly among the muffin liners—fill each about 2/3 of the way full.
Step 5: Add Apple Layer
Top each cheesecake with a generous spoonful of finely chopped apples. Press them lightly so they nestle into the batter.
Step 6: Make the Crisp Topping
In another bowl, stir together flour, oats, brown sugar, cinnamon, and coconut oil until crumbly. Sprinkle over each cheesecake to form a golden, crunchy topping.
Step 7: Bake to Perfection
Bake for 25–30 minutes, or until the tops are lightly golden and the centers set. You’ll know they’re ready when they jiggle just slightly when moved.
Step 8: Cool and Chill
Cool cheesecakes in the pan for 15 minutes, then move to the fridge for at least 2 hours or overnight. This helps the flavors settle and the texture firm up.
Step 9: Drizzle and Serve
Right before serving, drizzle caramel sauce over the top for that final, decadent touch.
HELPFUL TIPS:
- Use Tart Apples: Granny Smith apples balance the sweetness beautifully.
- Room Temp Cream Cheese: Always start with softened cream cheese to avoid lumps.
- Customize the Topping: Add chopped nuts like walnuts or pecans for an extra crunch.
- Don’t Skip Chilling: The cheesecakes need time to set properly for that classic texture.
DETAILS:
- Prep Time: 30 minutes
- Cook Time: 30 minutes
- Total Time: 1 hour (plus chilling time)
- Yield: 16–18 mini cheesecakes
- Category: Dessert
- Method: Baking
- Cuisine: American
- Diet: Vegetarian
NOTES:
- You can store these in the fridge for up to 5 days or freeze for up to 2 months.
- Let frozen cheesecakes thaw in the refrigerator overnight before serving.
- They’re a wonderful addition to a fall brunch or holiday dessert buffet.
NUTRITIONAL INFORMATION (Per Cheesecake Approx.):
- Calories: 250
- Fat: 15g
- Carbs: 25g
- Protein: 3g
- Fiber: 1g
- Sugar: 16g
FREQUENTLY ASKED QUESTIONS:
Can I use different fruits?
Yes! Pears or peaches make great seasonal alternatives. Just make sure they’re chopped finely.
What apples work best?
Granny Smith is the go-to for its tart flavor and firm texture, but Honeycrisp or Braeburn work well too.
Can I make this gluten-free?
Absolutely. Use gluten-free graham crackers and certified gluten-free oats and flour.
Can I skip the crust?
While the crust adds a lot of texture, you can bake them crustless for a low-carb option.
STORAGE INSTRUCTIONS:
Place leftovers in an airtight container and refrigerate for up to 5 days. For longer storage, freeze each cheesecake individually wrapped and store in a zip-top freezer bag for up to 2 months. Thaw in the fridge before serving.
Related Recipes:
If you liked this recipe, you’ll definitely enjoy these other cheesy delights:
- Snickerdoodle Cobbler
- Coconut Pineapple Cheesecake
- Apple Crisp Mini Cheesecakes
- Mini Lemon Cheesecakes
CONCLUSION:
Apple Crisp Mini Cheesecakes are the kind of dessert that bring joy with every bite. They’re easy to make, travel well, and combine the best of two classic desserts. Whether you’re baking them for a festive fall dinner, a cozy night in, or a Thanksgiving potluck, these mini cheesecakes deliver all the flavors of the season with irresistible charm.
Print
Apple Crisp Mini Cheesecakes
Description
The first time I made Apple Crisp Mini Cheesecakes was on a breezy October weekend, just as the scent of woodsmoke started to linger in the air. I was visiting my grandmother in her small countryside cottage, where apple trees lined the gravel path like old friends bowing in the wind. That day, we picked fresh apples together and talked about how apple desserts always feel like a warm hug from home.
This dessert is a celebration of comfort food traditions, but with a playful twist. Apple crisp has long been a staple of fall baking—served warm with a scoop of ice cream at family dinners or tucked into lunchboxes during harvest festivals. Now imagine marrying that nostalgic flavor with the velvety richness of cheesecake, in a handheld form that’s perfect for parties, potlucks, or just quiet moments with a cup of tea.
Apple Crisp Mini Cheesecakes combine everything we love about fall—spiced apples, buttery oats, creamy layers—into one delicious bite. With a crumbly oat crust and streusel topping surrounding a smooth cheesecake center, these minis are more than a dessert; they’re a celebration of the season.
Ingredients
For the Crust:
1 cup graham cracker crumbs
3/4 cup rolled oats
1/4 cup brown sugar
1/2 cup melted butter
For the Cheesecake Filling:
16 oz cream cheese, softened
1/4 cup granulated sugar
1/4 cup brown sugar
2 tbsp cornstarch
2 tsp vanilla extract
1/2 tsp ground cinnamon
1/8 tsp ground ginger
For the Apple Crisp Topping:
2 medium apples, peeled, cored, and finely chopped
1/4 cup all-purpose flour
1/4 cup rolled oats
1/4 cup brown sugar
1/2 tsp ground cinnamon
2 tbsp coconut oil (or melted butter)
Optional:
Caramel sauce for drizzling
Instructions
Step 1: Prep Your Oven and Pan
Preheat your oven to 350°F (175°C). Line a muffin tin with 12–18 paper liners depending on size. Lightly spray with nonstick cooking spray if desired.
Step 2: Make the Crust
In a bowl, mix graham cracker crumbs, oats, brown sugar, and melted butter until it resembles damp sand. Scoop about 1 tablespoon into each liner and press down firmly. Bake for 5 minutes, then let them cool.
Step 3: Whip Up the Cheesecake Filling
In a large mixing bowl, beat cream cheese until smooth and fluffy. Add both sugars, cornstarch, vanilla, cinnamon, and ginger. Blend until creamy and smooth.
Step 4: Spoon in the Cheesecake Layer
Distribute the cheesecake batter evenly among the muffin liners—fill each about 2/3 of the way full.
Step 5: Add Apple Layer
Top each cheesecake with a generous spoonful of finely chopped apples. Press them lightly so they nestle into the batter.
Step 6: Make the Crisp Topping
In another bowl, stir together flour, oats, brown sugar, cinnamon, and coconut oil until crumbly. Sprinkle over each cheesecake to form a golden, crunchy topping.
Step 7: Bake to Perfection
Bake for 25–30 minutes, or until the tops are lightly golden and the centers set. You’ll know they’re ready when they jiggle just slightly when moved.
Step 8: Cool and Chill
Cool cheesecakes in the pan for 15 minutes, then move to the fridge for at least 2 hours or overnight. This helps the flavors settle and the texture firm up.
Step 9: Drizzle and Serve
Right before serving, drizzle caramel sauce over the top for that final, decadent touch.
Notes
-
You can store these in the fridge for up to 5 days or freeze for up to 2 months.
-
Let frozen cheesecakes thaw in the refrigerator overnight before serving.
-
They’re a wonderful addition to a fall brunch or holiday dessert buffet.