
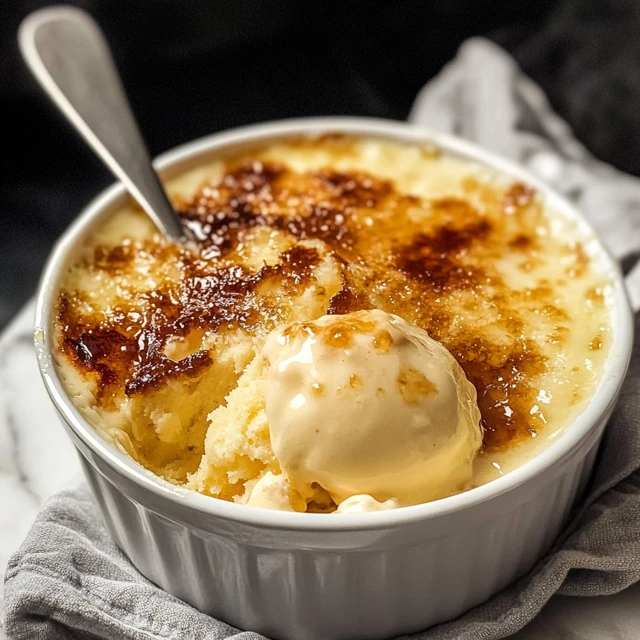
There’s something undeniably luxurious about crème brûlée. The silky custard, the contrast of the warm caramelized sugar crackle on top—it’s a dessert that brings both elegance and comfort to the table. Now imagine capturing all of that charm in a scoop of ice cream. That’s exactly what this Crème Brûlée Ice Cream does.

Inspired by the classic French dessert, this ice cream version combines velvety vanilla bean custard with sweet, crunchy shards of caramel to mimic that signature brûléed top. It’s a flavor experience that feels nostalgic and indulgent at once. Whether it’s the middle of summer or the middle of winter (when you’re just craving something creamy and sweet), this treat brings a touch of Parisian flair right to your kitchen.
I remember making this for a dinner party once, and one guest actually paused mid-bite and said, “Wait, this tastes like crème brûlée… but cold!” That moment captured exactly why I adore this recipe. It’s a little unexpected, deeply comforting, and makes a wonderful impression—without the need for a blowtorch.
Why You’ll Love This Recipe:
- No fancy equipment required: You don’t need an ice cream maker or a torch to enjoy that classic brûlée taste.
- Incredibly creamy texture: Thanks to the egg yolk custard base, every bite is rich and silky.
- Caramel crunch bits add surprise: The caramel shards mimic the crispy brûléed sugar top you love in traditional crème brûlée.
- Elegant but easy: It feels gourmet, but it’s surprisingly simple to make at home.
INGREDIENTS YOU’LL NEED:
For the ice cream custard:
- 500ml (2 cups) double cream
- 300ml (1 ¼ cups) whole milk
- 1 vanilla bean pod, split and seeds scraped
- 150g (¾ cup) caster sugar
- 6 large egg yolks
For the caramel shards:
- 100g (½ cup) caster sugar
- 2 tablespoons water
HOW TO MAKE CRÈME BRÛLÉE ICE CREAM:
STEP-BY-STEP INSTRUCTIONS:
Step 1: Infuse the cream Pour the double cream, milk, and the vanilla bean seeds (plus the pod itself) into a medium saucepan. Heat the mixture gently until it’s just about to boil—look for small bubbles forming around the edges. Turn off the heat and let it sit for about 15 minutes to infuse that deep vanilla flavor.
Step 2: Make the custard base In a large bowl, whisk the egg yolks and sugar together until pale and slightly thickened. Now, slowly pour the warm cream mixture into the egg yolks, whisking constantly so you don’t scramble the eggs.
Step 3: Thicken the custard Pour the combined mixture back into the saucepan and cook over low heat, stirring continuously. The key here is patience—don’t rush. You’ll know it’s ready when the custard thickens slightly and coats the back of a spoon. If you run your finger along the back of the spoon and the line stays, it’s perfect. Don’t let it boil.
Step 4: Chill the custard Strain the custard through a fine mesh sieve into a clean bowl to remove any bits of cooked egg and the vanilla pod. Let it cool to room temperature, then cover and chill it in the fridge for at least 4 hours or overnight. Cold custard churns much better.
Step 5: Make the caramel shards Line a baking sheet with parchment paper. Add the sugar and water to a small saucepan and heat gently until the sugar dissolves. Increase the heat and cook until the sugar turns a rich amber color. Carefully pour it onto the prepared baking sheet, spreading it thin. Let it cool and harden, then break it into small shards.
Step 6: Churn and freeze Once your custard is chilled, churn it in your ice cream maker according to the manufacturer’s instructions. In the final minute of churning, toss in your caramel shards so they swirl throughout. If you’re not using an ice cream maker, pour the custard into a container and freeze, stirring every 30–60 minutes for 3–4 hours until creamy. Fold in the caramel once it starts to firm up.
Step 7: Freeze and serve Transfer the churned ice cream to a lidded container and freeze for at least 4 hours or until firm. Before serving, let it sit at room temperature for about 5–10 minutes to soften slightly for that perfect scoop.
HELPFUL TIPS:
- Vanilla bean pod = deeper flavor: Don’t skip this! It gives the custard that rich, floral vanilla taste crème brûlée is known for.
- Strain the custard: Always strain it before chilling to get a silky smooth texture and remove any bits of cooked egg.
- Don’t overcook the caramel: Watch closely once it starts to change color—it can go from golden to burnt quickly.
- Add caramel at the right time: If you add it too early, it’ll melt into the custard; too late and it won’t mix evenly.
DETAILS:
- Prep Time: 30 minutes (plus chilling time)
- Cook Time: 20 minutes
- Total Time: 6–8 hours (includes chilling and freezing)
- Yield: Makes about 1 litre (roughly 6–8 scoops)
- Category: Dessert
- Method: Churned Ice Cream
- Cuisine: French-Inspired
- Diet: Vegetarian

NOTES:
- You can make the caramel shards a day ahead—just keep them in an airtight container until ready to mix in.
- For extra fun, sprinkle some leftover shards on top when serving!
NUTRITIONAL INFORMATION: (Per serving, approximate)
- Calories: 285
- Fat: 20g
- Saturated Fat: 12g
- Carbohydrates: 22g
- Sugar: 20g
- Protein: 4g
FREQUENTLY ASKED QUESTIONS:
Can I make this without an ice cream maker?
Absolutely! Just freeze the custard in a shallow container and stir it every 30–60 minutes for a few hours. It might be a bit less smooth, but still delicious.
Can I use vanilla extract instead of a vanilla bean pod?
Yes, but use high-quality vanilla extract—about 1 tablespoon. It won’t be quite the same, but still very tasty.
How long will this ice cream keep?
Stored in an airtight container in the freezer, it will last about 2 weeks. But good luck keeping it around that long!
STORAGE INSTRUCTIONS:
Keep the ice cream in a sealed container in the coldest part of your freezer. If it’s been frozen solid, let it soften for a few minutes at room temperature before scooping. For best texture, enjoy within 1–2 weeks.

Related Recipes
If you liked this recipe, you’ll definitely enjoy these other creamy delights:
- Cinnamon Roll French Toast Bites
- Torrijas (Spanish-Style French Toast)
- Crème Brûlée French Toast Casserole
- Coffee Whipped Cream
CONCLUSION
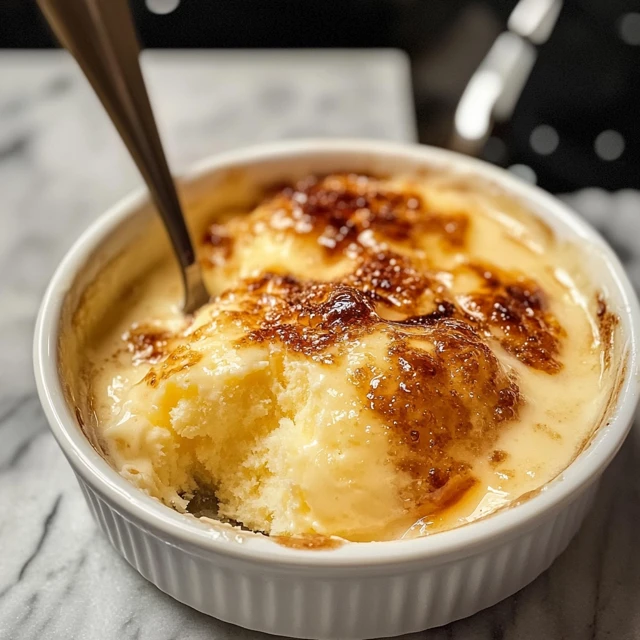
Crème Brûlée Ice Cream is a dreamy combination of two beloved desserts. It’s got all the richness of a classic custard, the charm of crunchy caramel, and the cooling comfort of a frozen treat. Whether you’re whipping it up for a summer gathering or treating yourself on a quiet night in, this recipe is sure to become one of your favorites.
Print
Crème Brûlée Ice Cream
Description
There’s something undeniably luxurious about crème brûlée. The silky custard, the contrast of the warm caramelized sugar crackle on top—it’s a dessert that brings both elegance and comfort to the table. Now imagine capturing all of that charm in a scoop of ice cream. That’s exactly what this Crème Brûlée Ice Cream does.
Inspired by the classic French dessert, this ice cream version combines velvety vanilla bean custard with sweet, crunchy shards of caramel to mimic that signature brûléed top. It’s a flavor experience that feels nostalgic and indulgent at once. Whether it’s the middle of summer or the middle of winter (when you’re just craving something creamy and sweet), this treat brings a touch of Parisian flair right to your kitchen.
I remember making this for a dinner party once, and one guest actually paused mid-bite and said, “Wait, this tastes like crème brûlée… but cold!” That moment captured exactly why I adore this recipe. It’s a little unexpected, deeply comforting, and makes a wonderful impression—without the need for a blowtorch.
Ingredients
For the ice cream custard:
500ml (2 cups) double cream
300ml (1 ¼ cups) whole milk
1 vanilla bean pod, split and seeds scraped
150g (¾ cup) caster sugar
6 large egg yolks
For the caramel shards:
100g (½ cup) caster sugar
2 tablespoons water
Instructions
Step 1: Infuse the cream Pour the double cream, milk, and the vanilla bean seeds (plus the pod itself) into a medium saucepan. Heat the mixture gently until it’s just about to boil—look for small bubbles forming around the edges. Turn off the heat and let it sit for about 15 minutes to infuse that deep vanilla flavor.
Step 2: Make the custard base In a large bowl, whisk the egg yolks and sugar together until pale and slightly thickened. Now, slowly pour the warm cream mixture into the egg yolks, whisking constantly so you don’t scramble the eggs.
Step 3: Thicken the custard Pour the combined mixture back into the saucepan and cook over low heat, stirring continuously. The key here is patience—don’t rush. You’ll know it’s ready when the custard thickens slightly and coats the back of a spoon. If you run your finger along the back of the spoon and the line stays, it’s perfect. Don’t let it boil.
Step 4: Chill the custard Strain the custard through a fine mesh sieve into a clean bowl to remove any bits of cooked egg and the vanilla pod. Let it cool to room temperature, then cover and chill it in the fridge for at least 4 hours or overnight. Cold custard churns much better.
Step 5: Make the caramel shards Line a baking sheet with parchment paper. Add the sugar and water to a small saucepan and heat gently until the sugar dissolves. Increase the heat and cook until the sugar turns a rich amber color. Carefully pour it onto the prepared baking sheet, spreading it thin. Let it cool and harden, then break it into small shards.
Step 6: Churn and freeze Once your custard is chilled, churn it in your ice cream maker according to the manufacturer’s instructions. In the final minute of churning, toss in your caramel shards so they swirl throughout. If you’re not using an ice cream maker, pour the custard into a container and freeze, stirring every 30–60 minutes for 3–4 hours until creamy. Fold in the caramel once it starts to firm up.
Step 7: Freeze and serve Transfer the churned ice cream to a lidded container and freeze for at least 4 hours or until firm. Before serving, let it sit at room temperature for about 5–10 minutes to soften slightly for that perfect scoop.
Notes
-
You can make the caramel shards a day ahead—just keep them in an airtight container until ready to mix in.
-
For extra fun, sprinkle some leftover shards on top when serving!