
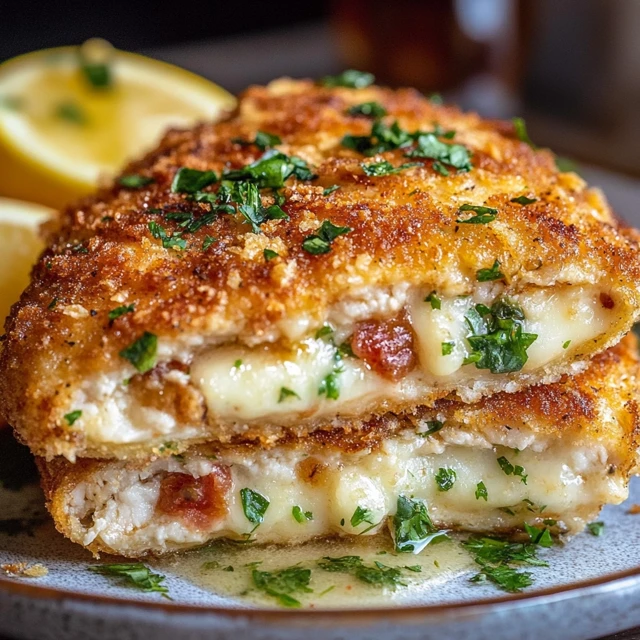
There’s something undeniably comforting about slicing into a golden, crisp chicken breast and watching melted, herbed butter spill onto your plate. Chicken Kiev is one of those classic dishes that feels both elegant and homey — a dish that many grew up eating at special family dinners or learning to make from a beloved grandparent.

Chicken Kiev actually has a bit of a mysterious past. Some say it originated in Ukraine (hence the name), while others argue its roots are Russian or even French. Regardless of where it came from, it’s become a beloved staple across Eastern Europe — and for good reason. The combination of juicy chicken wrapped around flavorful garlic herb butter, then breaded and fried to crispy perfection, is the kind of meal that never goes out of style.
Growing up, this was a dish reserved for special occasions — birthdays, holidays, or when guests were coming over. It wasn’t just the taste that made it special; it was the process. Watching the butter get mixed and chilled, helping to pound out the chicken flat, rolling it all up — it felt like a little family project that always ended in the most satisfying, buttery reward.
So, if you’re looking for a meal that feels both fancy and comforting — that’ll have your dinner guests swooning or make your Tuesday night feel a little more special — this Easy Chicken Kiev is exactly what you need.
Why You’ll Love This Recipe:
- It’s crispy on the outside, juicy on the inside, and bursting with flavor.
- Despite sounding fancy, it’s totally doable at home with a little prep.
- That garlic herb butter? Absolutely addictive.
- It’s a great make-ahead dish for dinner parties or family meals.
- A crowd-pleaser that works with simple sides like mashed potatoes or a crisp salad.
INGREDIENTS YOU’LL NEED:
For the Garlic Herb Butter:
- 8 Tbsp (1 stick) unsalted butter, room temperature
- 2 garlic cloves, finely minced
- 1 1/2 Tbsp fresh parsley, finely chopped
- 1 tsp lemon juice
- 1/4 tsp salt
- 1/8 tsp black pepper
For the Chicken:
- 4 chicken breasts (boneless, skinless)
- 1 tsp salt
- 1/4 tsp black pepper
- 1/2 cup all-purpose flour
- 2 large eggs
- 1 cup plain breadcrumbs
- Avocado oil or any neutral oil, for frying

HOW TO MAKE EASY CHICKEN KIEV:
STEP-BY-STEP INSTRUCTIONS:
1. Make the Garlic Herb Butter
Start by mixing up the star of the show — the garlic herb butter. In a small bowl, combine the softened butter with minced garlic, chopped parsley, lemon juice, salt, and pepper. Stir until everything is evenly blended. It should smell incredible already!
Place the butter mixture on a piece of plastic wrap, shape it into a small log, and wrap it tightly. Pop it in the freezer for about 30 minutes or until firm. This step is crucial — it helps the butter stay put inside the chicken while it cooks.
Little tip: You can make this butter ahead of time and keep it in the freezer. It’s great not just for Chicken Kiev, but on toast, veggies, or even steak.
2. Prep the Chicken
While your butter chills, take each chicken breast and place it between two sheets of plastic wrap or parchment paper. Using a meat mallet or rolling pin, gently pound the chicken to about 1/4 inch thickness. You want it thin enough to roll, but not so thin it tears.
Sprinkle both sides of each piece with a little salt and pepper.
3. Assemble the Kiev
Take the butter out of the freezer and cut it into four equal pieces. Place one piece of butter in the center of each pounded chicken breast.
Now the fun part — rolling! Fold the sides of the chicken over the butter, then roll it up tightly like a burrito, tucking in the ends. You want the butter completely sealed inside. If needed, you can secure the roll with toothpicks, but a tight roll usually holds well.
Place the rolled chicken on a plate and refrigerate it for at least 30 minutes. This helps it firm up and stay sealed during cooking.
4. Coat and Bread the Chicken
Set up your breading station: one plate with flour, one bowl with beaten eggs, and another plate with breadcrumbs.
First, roll the chilled chicken in flour, making sure it’s completely coated. Then dip it in the egg mixture, and finally coat it in breadcrumbs. Press the breadcrumbs in a bit to help them stick well.
5. Fry to Golden Perfection
Heat about 1/2 inch of oil in a skillet over medium heat. Once the oil is hot, carefully place the chicken rolls seam-side down in the pan. Fry them for about 3-4 minutes per side, or until the coating is crisp and golden brown.
You’re not trying to cook the chicken through at this point — just getting that beautiful crust.
6. Finish in the Oven
Transfer the browned chicken to a baking dish and pop it into a preheated oven at 350°F (175°C). Bake for 20–25 minutes, or until the chicken is cooked through and the internal temperature reaches 165°F (74°C).
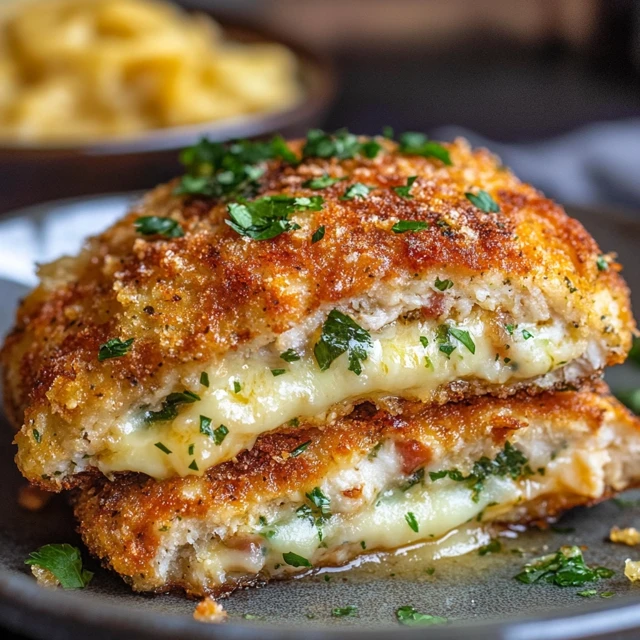
When you cut into it, that herb butter should ooze out like a warm, savory surprise.
HELPFUL TIPS:
- Chill that butter! It needs to be firm so it doesn’t leak out while cooking.
- Seal it tight. Rolling the chicken carefully ensures the butter stays inside.
- Toothpicks are optional. Use them if your roll feels loose.
- Breadcrumb texture: Panko works too if you like a crunchier coating.
- Make ahead: You can prep the rolls in advance and refrigerate overnight.
DETAILS:
- Prep Time: 45 minutes (includes chilling time)
- Cook Time: 30 minutes
- Total Time: 1 hour 15 minutes
- Yield: 4 servings
- Category: Main Course
- Method: Frying & Baking
- Cuisine: Eastern European
- Diet: High-Protein

NOTES:
- If your chicken breasts are thick, consider slicing them in half lengthwise before pounding.
- For a lighter version, you can bake the breaded chicken at 400°F for 30–35 minutes instead of frying first — though you’ll lose some of that crispiness.
NUTRITIONAL INFORMATION:
(Per serving, estimated)
- Calories: 430
- Protein: 35g
- Carbohydrates: 14g
- Fat: 27g
- Saturated Fat: 11g
- Fiber: 1g
- Sugar: 0g
- Sodium: 450mg
FREQUENTLY ASKED QUESTIONS:
Can I freeze Chicken Kiev?
Absolutely! Assemble and bread the chicken, then freeze on a baking sheet. Once solid, transfer to a freezer bag. Bake from frozen at 400°F for about 45–50 minutes.
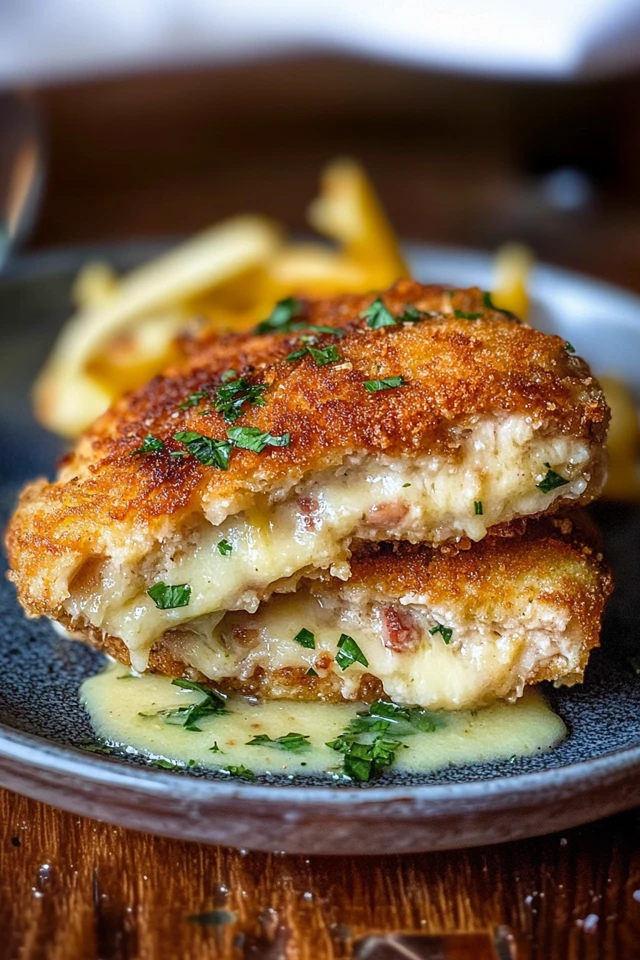
What sides go best with Chicken Kiev?
Mashed potatoes, buttery rice, roasted veggies, or even a fresh garden salad all work beautifully.
Why is my butter leaking out?
It could be from over-pounding or not sealing tightly. Make sure the butter is well-chilled and the chicken is securely rolled.
STORAGE INSTRUCTIONS:
Leftover Chicken Kiev can be stored in an airtight container in the fridge for up to 3 days. Reheat in the oven at 350°F for 15–20 minutes to maintain crispiness. You can also reheat it in an air fryer.
Related Recipes
If you liked this recipe, you’ll definitely enjoy these other cheesy delights:
- Garlic Tomato Chicken with Mozzarella
- Heart-Healthy Rosemary Chicken Dijon
- Nigella-Inspired Chicken Thighs
- A Cozy Italian Classic: Chicken Milanese
CONCLUSION
Easy Chicken Kiev is the kind of recipe that brings a little bit of old-world charm right to your dinner table. It’s indulgent, flavorful, and incredibly satisfying. Whether you’re making it for a cozy family dinner or a special celebration, this dish is sure to leave an impression.
Print
Easy Chicken Kiev
Description
There’s something undeniably comforting about slicing into a golden, crisp chicken breast and watching melted, herbed butter spill onto your plate. Chicken Kiev is one of those classic dishes that feels both elegant and homey — a dish that many grew up eating at special family dinners or learning to make from a beloved grandparent.
Chicken Kiev actually has a bit of a mysterious past. Some say it originated in Ukraine (hence the name), while others argue its roots are Russian or even French. Regardless of where it came from, it’s become a beloved staple across Eastern Europe — and for good reason. The combination of juicy chicken wrapped around flavorful garlic herb butter, then breaded and fried to crispy perfection, is the kind of meal that never goes out of style.
Growing up, this was a dish reserved for special occasions — birthdays, holidays, or when guests were coming over. It wasn’t just the taste that made it special; it was the process. Watching the butter get mixed and chilled, helping to pound out the chicken flat, rolling it all up — it felt like a little family project that always ended in the most satisfying, buttery reward.
So, if you’re looking for a meal that feels both fancy and comforting — that’ll have your dinner guests swooning or make your Tuesday night feel a little more special — this Easy Chicken Kiev is exactly what you need.
Ingredients
For the Garlic Herb Butter:
8 Tbsp (1 stick) unsalted butter, room temperature
2 garlic cloves, finely minced
1 1/2 Tbsp fresh parsley, finely chopped
1 tsp lemon juice
1/4 tsp salt
1/8 tsp black pepper
For the Chicken:
4 chicken breasts (boneless, skinless)
1 tsp salt
1/4 tsp black pepper
1/2 cup all-purpose flour
2 large eggs
1 cup plain breadcrumbs
Avocado oil or any neutral oil, for frying
Instructions
Start by mixing up the star of the show — the garlic herb butter. In a small bowl, combine the softened butter with minced garlic, chopped parsley, lemon juice, salt, and pepper. Stir until everything is evenly blended. It should smell incredible already!
Place the butter mixture on a piece of plastic wrap, shape it into a small log, and wrap it tightly. Pop it in the freezer for about 30 minutes or until firm. This step is crucial — it helps the butter stay put inside the chicken while it cooks.
Little tip: You can make this butter ahead of time and keep it in the freezer. It’s great not just for Chicken Kiev, but on toast, veggies, or even steak.
While your butter chills, take each chicken breast and place it between two sheets of plastic wrap or parchment paper. Using a meat mallet or rolling pin, gently pound the chicken to about 1/4 inch thickness. You want it thin enough to roll, but not so thin it tears.
Sprinkle both sides of each piece with a little salt and pepper.
Take the butter out of the freezer and cut it into four equal pieces. Place one piece of butter in the center of each pounded chicken breast.
Now the fun part — rolling! Fold the sides of the chicken over the butter, then roll it up tightly like a burrito, tucking in the ends. You want the butter completely sealed inside. If needed, you can secure the roll with toothpicks, but a tight roll usually holds well.
Place the rolled chicken on a plate and refrigerate it for at least 30 minutes. This helps it firm up and stay sealed during cooking.
Set up your breading station: one plate with flour, one bowl with beaten eggs, and another plate with breadcrumbs.
First, roll the chilled chicken in flour, making sure it’s completely coated. Then dip it in the egg mixture, and finally coat it in breadcrumbs. Press the breadcrumbs in a bit to help them stick well.
Heat about 1/2 inch of oil in a skillet over medium heat. Once the oil is hot, carefully place the chicken rolls seam-side down in the pan. Fry them for about 3-4 minutes per side, or until the coating is crisp and golden brown.
You’re not trying to cook the chicken through at this point — just getting that beautiful crust.
Transfer the browned chicken to a baking dish and pop it into a preheated oven at 350°F (175°C). Bake for 20–25 minutes, or until the chicken is cooked through and the internal temperature reaches 165°F (74°C).
When you cut into it, that herb butter should ooze out like a warm, savory surprise.
Notes
-
If your chicken breasts are thick, consider slicing them in half lengthwise before pounding.
-
For a lighter version, you can bake the breaded chicken at 400°F for 30–35 minutes instead of frying first — though you’ll lose some of that crispiness.